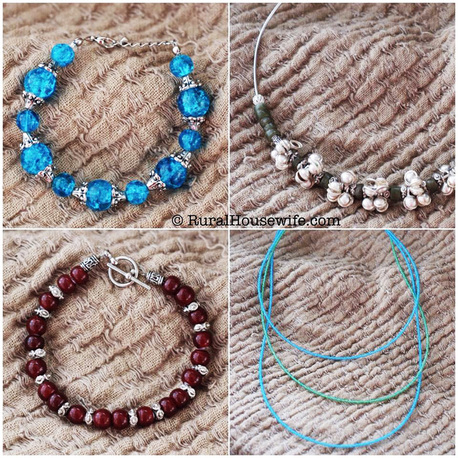
 It has been so long since I have taken out my beading/jewelry making basket. I just haven't been in a creative mood. So when my hubby told me he was going out for guys night, I decided it was time to break out the FUN, clear off my favorite table and get to work. At first it was a bit of a struggle, coming up with designs that I liked. I would slip the beads on and off of the wires so many times, I started to feel somewhat defeated thinking I was in a creative slump. I started throwing myself a "pity party". I admit - it was pathetic - lol. BUT as you can see, I pulled myself out of the moshpit of my pity party and just relaxed. I mean this isn't rocket science, it was supposed to be fun - gosh darnit! I mean at this point the cats were having more fun then me - lol. So relaxing is what I did, and the creative juices started to flow - to the point of losing track of time and not realizing that it was 1 in the morning when I stopped and put everything away for the night/morning. Now my challenge to myself is to do more projects more often.
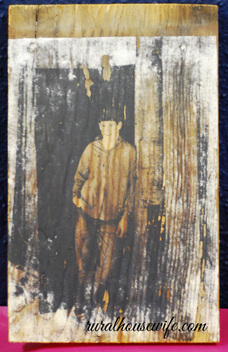
Recently I received a Visa gift card from a friend for helping them with their website, so I decided to take a little online shopping spree at my favorite Bead store in Olympia, Washington - Shipwreck Beads. At first I just added everything I have wanted and needed to make more jewelry, I figured once I was done filling my cart, I would go through and weed it down to how much money I actually had on the card. To my surprise I only had to remove 2 things that I was if'y about and the card covered the rest - including shipping! Praise God! Now to wait patiently for the shipment to arrive so I can get more projects completed! My Boss' son is graduating from High School this weekend. So for the graduation party she wanted to put some pictures of him on Wood (like the video below). She saw it on Pinterest. So since she was spending most of her time with family and getting the house ready - this became my job! :) I was very excited since I too had seen the video on Pinterest and thought is was a GREAT idea! So I was up for the mission... I started with 10 blocks of weathered wood that she had her hubby cut from the wood in the barn. Then we realized that we didn't have the Gel Medium that it tells you that you need. Hmmm. She searched Hi and Lo and still nothing - so when we were about to scrap the idea and do something different we remembered that the new tenant next door was the art teacher for the high school. And guess what?! She had some! Yippee! I started by wiping all the pieces of wood down with a cloth, measuring and printing the pictures. Next step was to apply the Gel Medium. So far so good. Pressed the pictures, color side down, rubbed out all the bubbles, let dry over night. Arrived to work this morning very excited about the next process which was to wet the backs of each of the pictures with water and rub off the paper to reveal the image. Easy Peasy - Right? I mean the gal in the video makes it look like it takes no time at all. After trying the first one, then the next, and then the next one after that, I realized something very important... this was not going as easy as the vid shows. Thinking to myself - I must be doing something wrong. So I rewatched the video, then I read the comments below the video - and I saw one comment that said "if all the white won't come off then just get it as best as you can without pealing off the picture, then apply the mod podge and it will take care of the little white areas." Awesome! So that is what I did...
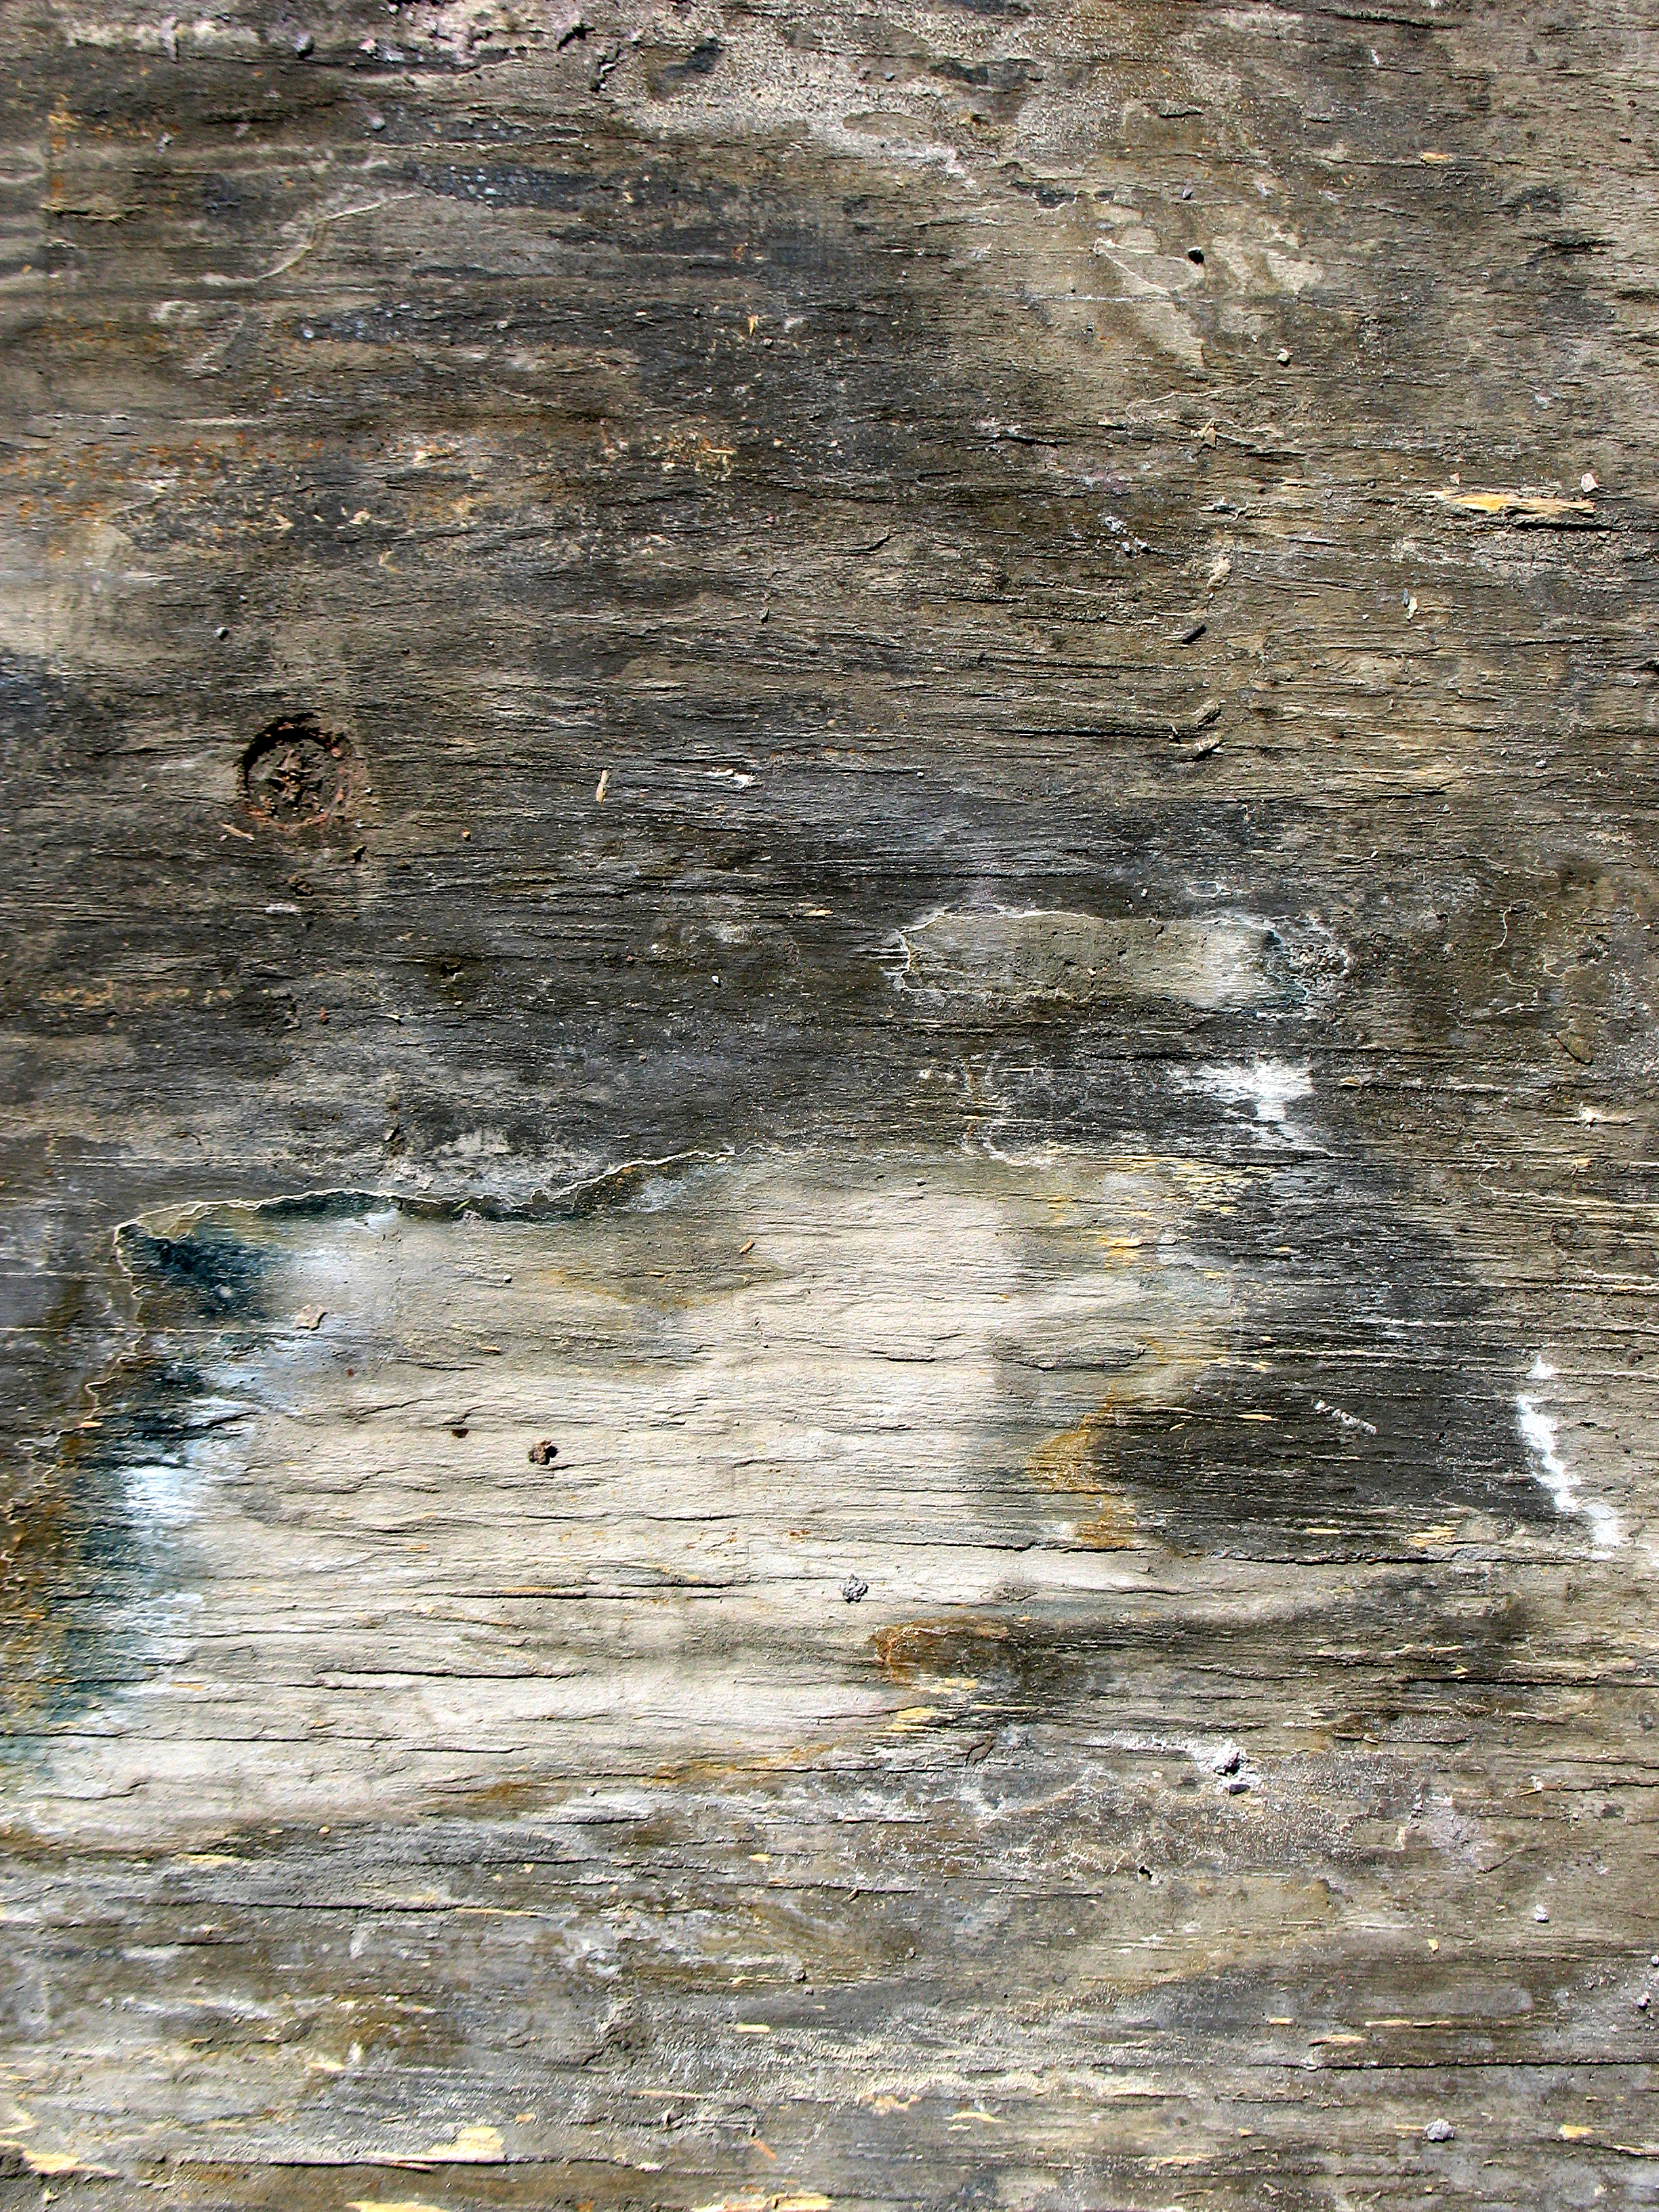
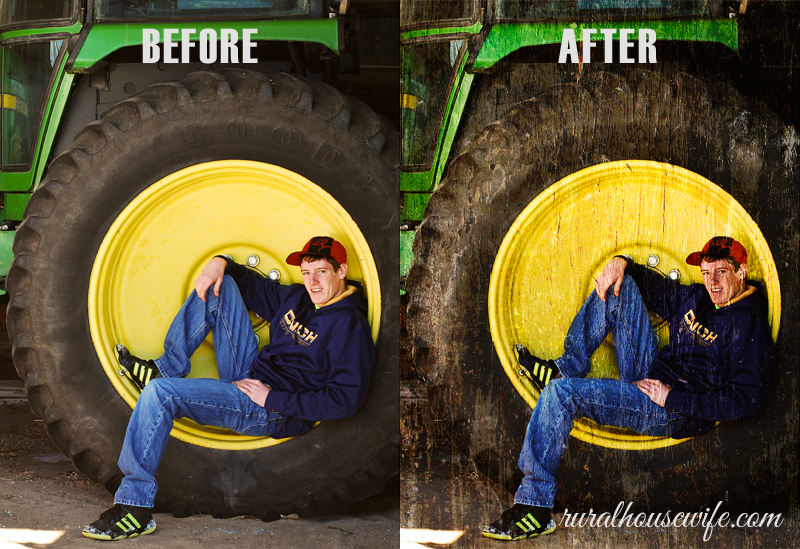 I was so excited this worked! So next I printed out all the pics that I had applied the wood grain layer to. Set out my wood blocks and applied a thin layer of Matte Mod Podge to the wood. Next I placed each of the pics on the wood blocks, and smoothed out all of the bubbles. At this point, you can either wait for the underlayer to dry OR you can do what I did (because I can be impatient) and just coat the top of each of the pics with a thin layer of Matte Mod Podge. I then set them outside to dry. Here is the finished product. What do you think? Personally I like it a lot and I like the way it still looks a little weathered but with a whole lot less hassle! Here is the wood grain photo I used as the wood grain layer >> Download <<  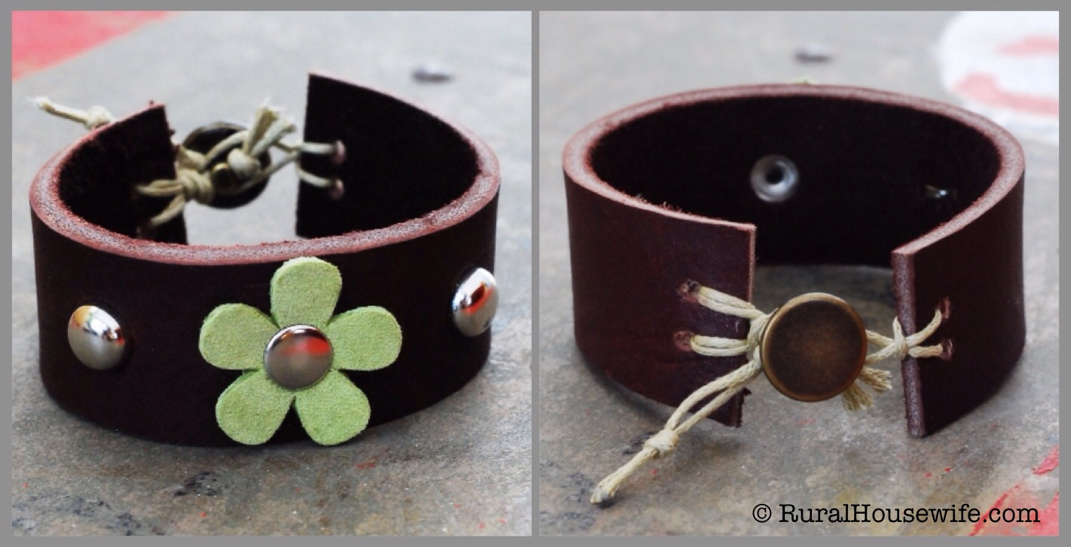 Made 02.22.13 Last year I bought some Leather Scraps from Hobby Lobby. Brought it home and then didn't really know what to do with it all. So this year, I have decided to tackle it one project at a time - to see what I can come up with and to see what I can make out of it all. I am having so much fun and learning so many things. I keep wanting to go back down to the city (3.5 hours away) and get more leather, but I am trying to push myself to use more of it before I get any more. 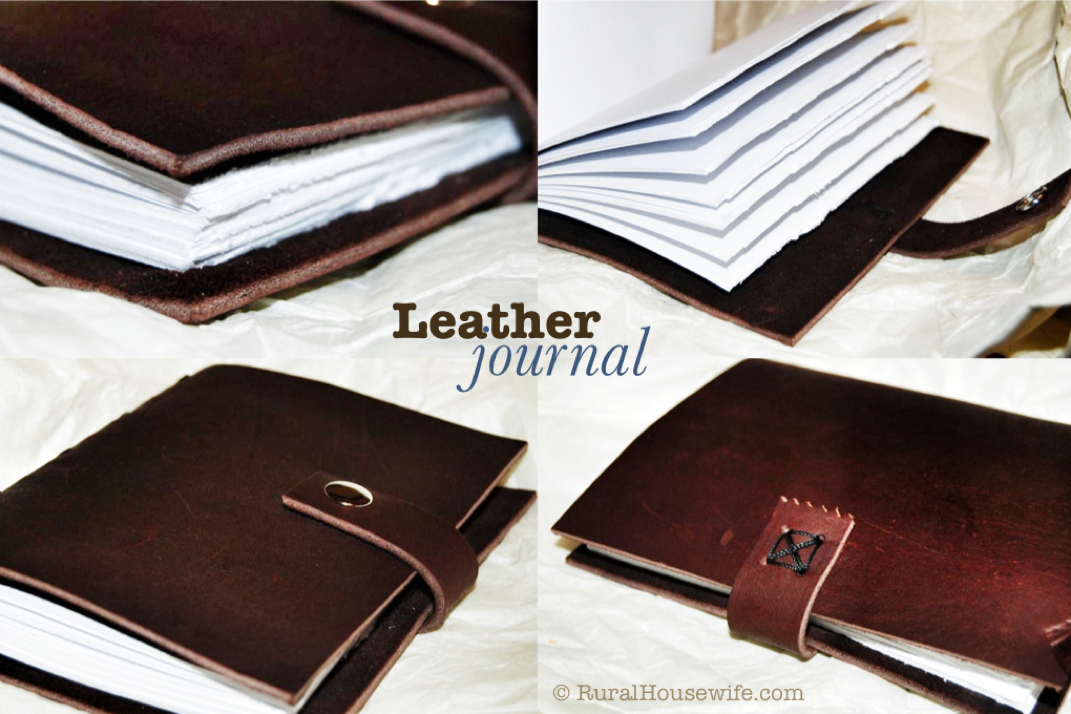 Made 12.15.12 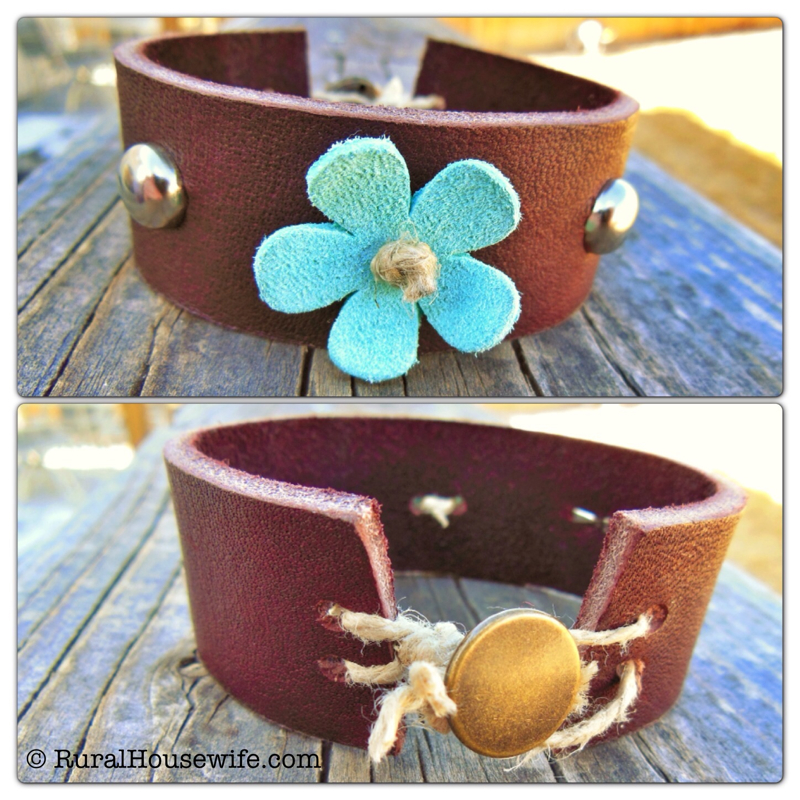 Made 02.14.13 |

Categories
All

|

