Rural Housewife
  • HOME
    • My Story
    • Contact Me
  • BLOG
  • WE LOVE
  • RECIPES
    • Baked Goods
    • Breakfast
    • Chocolate
    • Dinner
    • Gluten Free
    • Granola
    • Make Ahead Meals
    • Mexican Favorites
    • Sugar Free
  • RESOURCES
    • Canning
    • Dehydrating
    • Frugal Living
    • Gardening
    • Meal Planning
    • Old Fashion Living
    • Raising Chickens
    • Small Business Dir. >
      • Submit Your Business
    • PROJECTS >
      • Crafts & Gifts
      • Holidays >
        • Christmas
        • Halloween
        • Mother's Day
        • Valentine's Day
      • Photography
    • Winter Sowing

Blog

Starting My Pressure Canning Journey

2/24/2023

0 Comments

 
Recently I bought the Instant Pot Max - I have been saving for it for quite some time. I am over-the-moon excited about it! About a week or so ago I decided to give it it's maiden-voyage and can some pinto beans. You can only can 4 pints at a time. But you know what? That's ok with me! Especially since I am just starting out on this pressure canning journey. 1/4 cup of rinsed (but dry) pinto beans, 1/2 tsp garlic salt, and water. 75 mins of pressure canning, and then natural release which takes about an hour. All in all I was ecstatic with the results! So right before bed I decided "Hey, I can put in 4 more pints!" And that's exactly what I did. Then a couple of days later I tried navy beans - which I did 3/4 cup of rinsed (but dry) beans, 1/2 tsp garlic salt, and water. 75 mins of pressure canning and Voila! 4 more pints of beans for the pantry shelves.

To say I am hooked is an understatement. Yesterday I decided I was going to take the leap and do 'raw pack pork'. That was a little more labor intensive since it was a bone-in pork shoulder that I got on sale and there was a lot of fat to remove. I stuffed those little pint jars as much as I could (leaving an inch head space), wiped the rims with vinegar and put on the lids. Set the timer and away they went. About an hour later I came up from the basement (I was working at the time) and noticed my IP Max flashing ALT at me - I was devastated! Did it get to temp? When did it error out? Aaagghh!!

I gathered my wits and researched what to do. Once I reset the canner I found that you can can cooked meat at the same temp & time. So that's what I did. I double checked everything and started over with the pint jars I had in their already. This time I came upstairs every half hour to check it's progress to make sure I didn't ALT again. And thankfully it went through it's entire process and natural released at the end. All four pints sealed and were ready for their resting time.

To say pressure canning is stressful is truthful. Yeah, I know I am "cheating" but that's what I can handle at this moment in life and I am ok with that. I will just keep pluggin along 4 pints at a time. :)
0 Comments

Sawtooth Botanical Gardens

7/19/2022

2 Comments

 
2 Comments

DIY Rustic Wood End Tables

3/30/2018

0 Comments

 
Picture
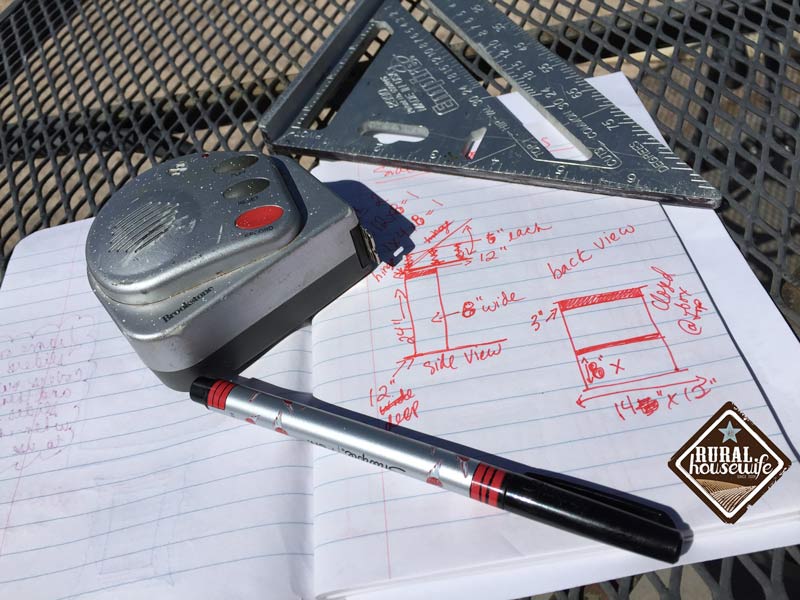
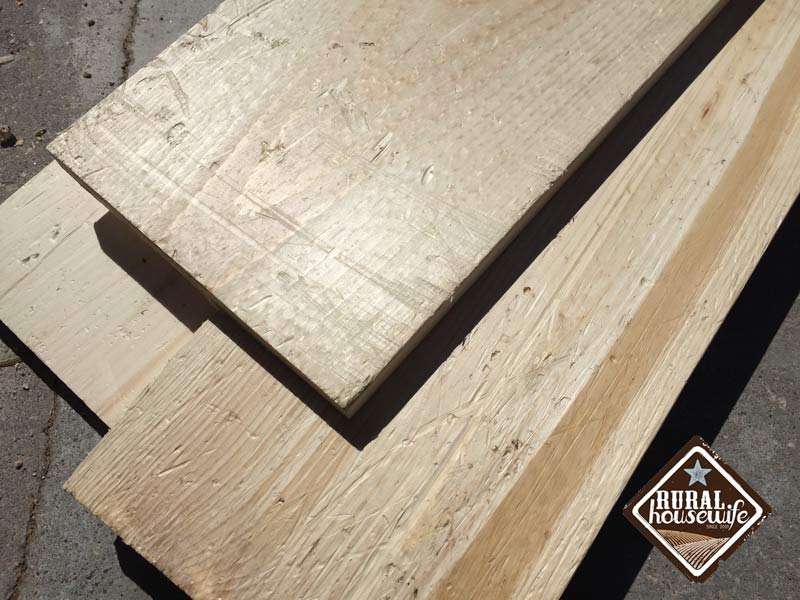
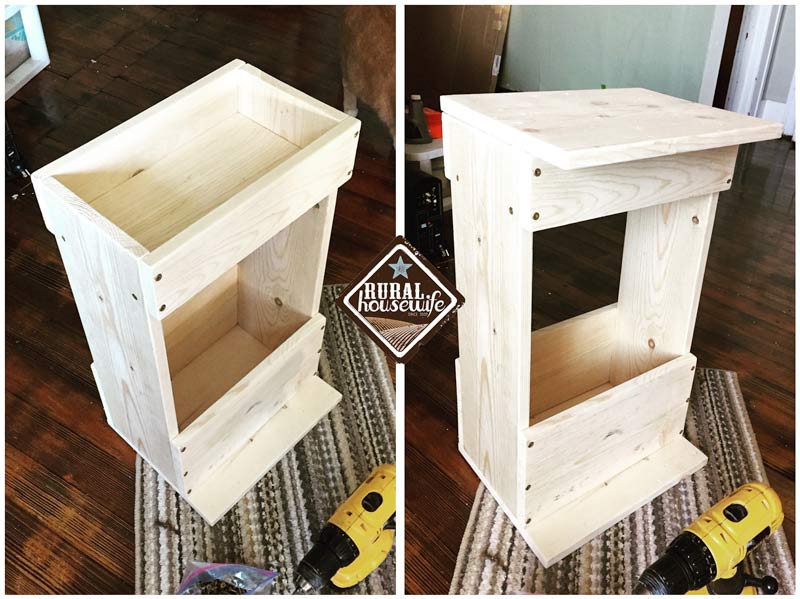
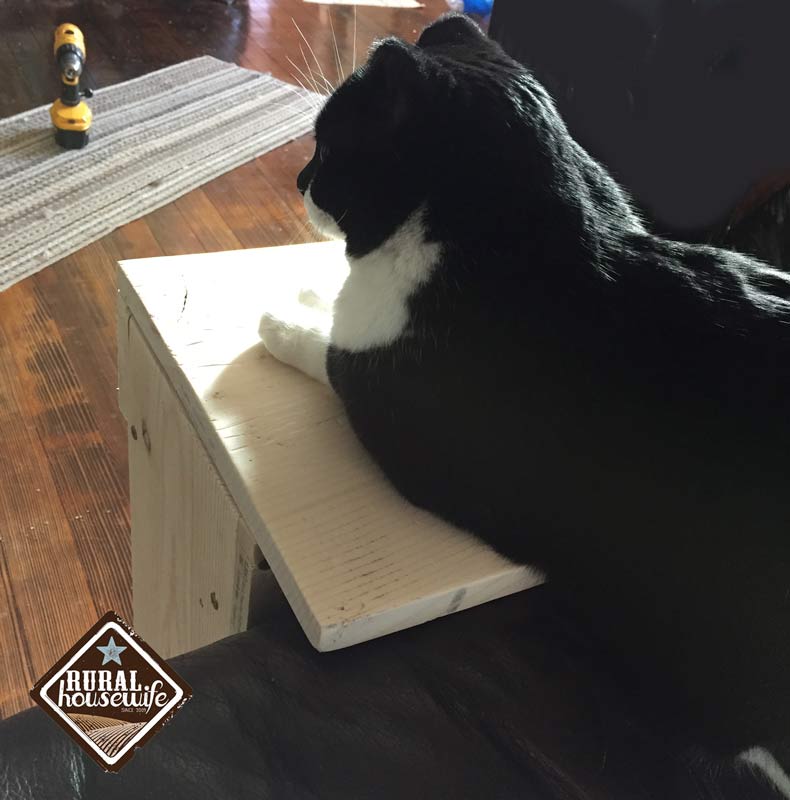
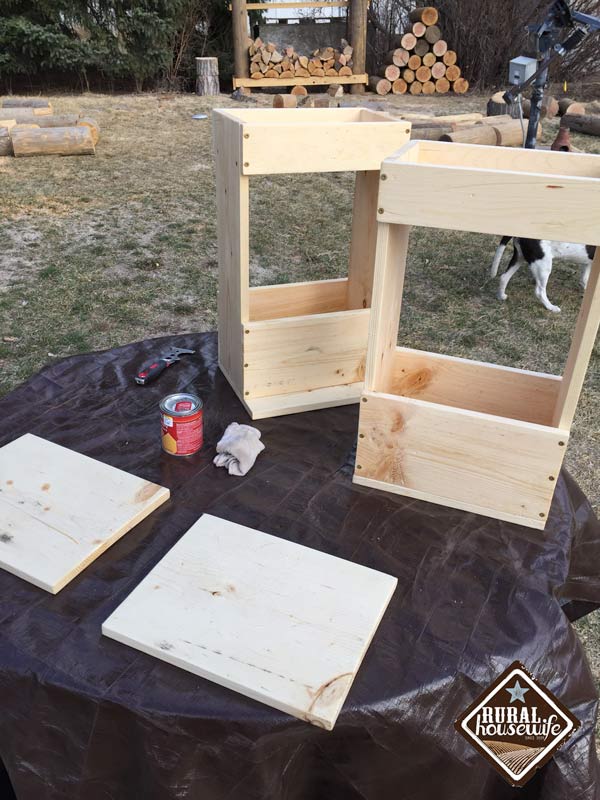
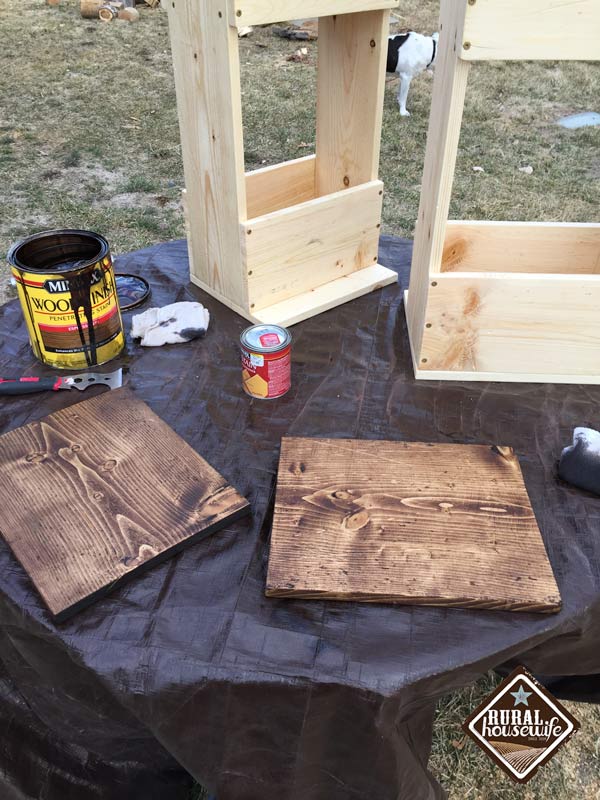
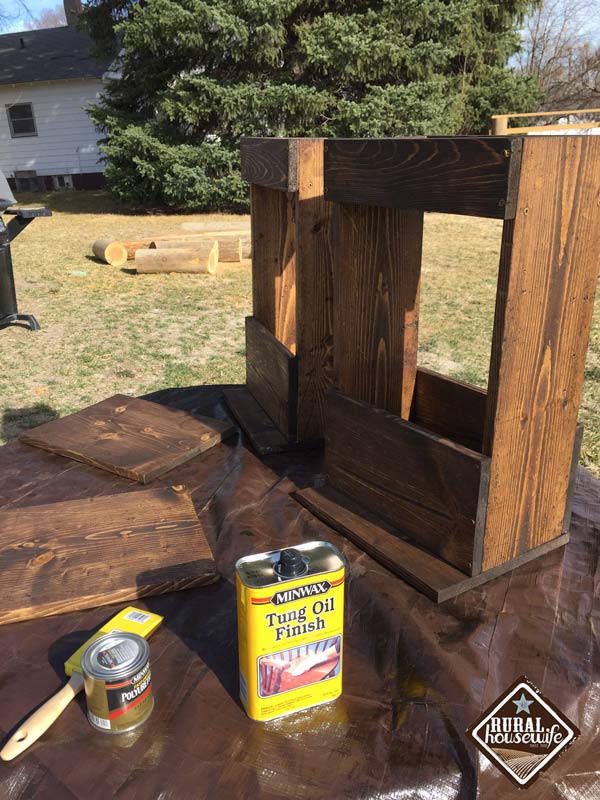
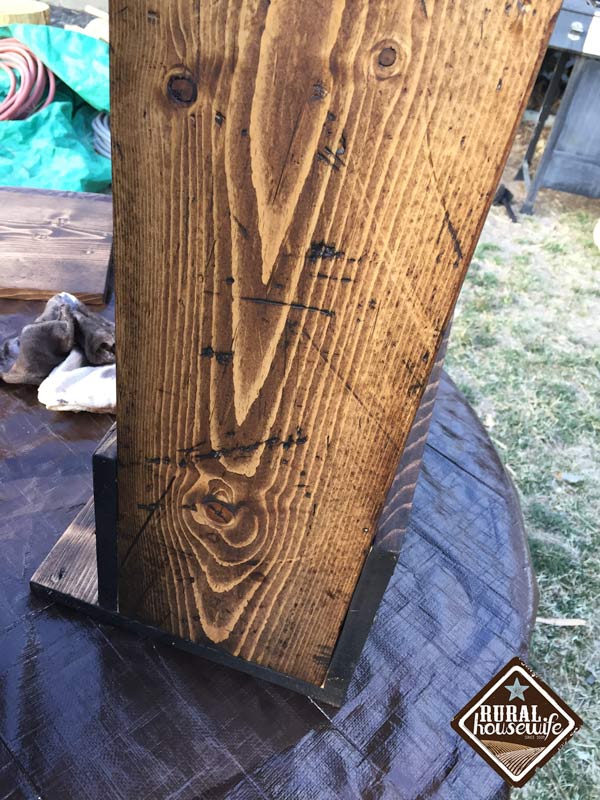
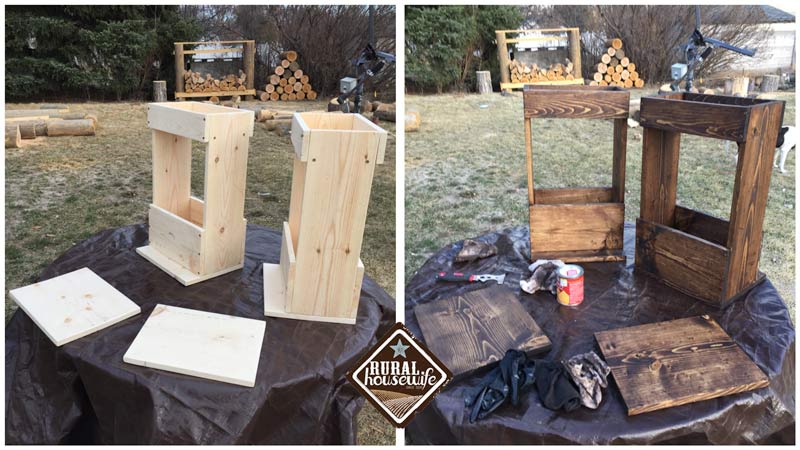
Last year we bought our first house. It is a bit smaller then the house we were renting, so some of our furniture didn't quite fit. So, I use that as a challenge to build our own. And boy have I been having so much fun getting back into using the power tools! :)

One of the projects I have recently been working on are end tables for our couch. I cruised Pinterest for ideas and found some table ideas I could use to build to fit our needs. I found one design that was very simple, but they were selling them for $160 - Holy Cow! That is totally out of our price range!

I drew up a plan, went to the local lumber yard (always support local businesses if you can), purchased my lumber and then took it home to get started. Luckily my husband is pretty on board when it comes to my crazy ideas. And, of course I am doing this in winter, so most of the project has been inside. And then having to wait for warm enough days to stain, seal, and poly.
Drawing out my plans before getting the wood and cutting.
Distressing the wood. That was the funnest part! We slid it up and down the gravel driveway.
After beating it into submission. Can't wait to see how this comes out once stained.
Finished putting the pieces together. I build two. So the one on the left is showing the box top, and the one on the right is showing it with the lid in place.
The kitty testing out how sturdy it is before we stain it.
Used a pre-conditioner for the pine (it prepares the wood so you don't get a blotchy stain finish) - Don't skip this step.
Used the stain we used for the hardwood floors. Minwax Espresso.
Sealed the pieces with Minwax Tung Oil Finish. Two coats, hand rubbed.
Look at those marks! I am so glad we distressed the wood before building them.
Look at that beautiful grain! Just gorgeous!
Download Plans
0 Comments

My Commute - Then & Now

3/24/2017

0 Comments

 
Picture
When living in Colorado, this used to be my commute - every morning and every evening.

On a good day (weather wise) it would take me over 45 minutes one-way to get to work.

Now... my commute takes 30 minutes - but with NO traffic. Yes, you might think that isn't much of a difference, but trust me, it is!
0 Comments
<<Previous
    Picture
    Picture
    Explore the New Mountain Rose Journal & Catalog

    Picture

    Categories

    All
    365 Days Of Thanks
    Adventures
    Appetizers / Side Dishes
    Baked Goods
    Being A Wife
    Bible Study
    Bread
    Breakfast
    Budget Fun
    Canning
    Chocolate
    Chocolate Mondays
    Christmas
    Cookies
    Craft Nights
    Crafts
    Dairy Free
    Dehydrator
    Dinner
    D I Y
    E-BOOKS
    Experiments
    Farm Girl
    Freeze Dried
    Furniture
    Gift Ideas
    Gluten Free
    Green Tomatoes
    Halloween
    Handmade
    Herbal Remedies
    Homemade
    Ice Cream
    InstantPot Recipes
    Leather
    Low Sodium
    Make Ahead Meals
    Meals In A Jar
    Mexican Favorites
    Mothers Day
    Mug Recipes
    My Attempt At Gardening
    My Attempt At Sewing
    My Faith
    My Life
    Natural Beauty
    Our Town
    Painting
    Photography
    PRINTABLES
    Pumpkin
    Quick Fixin's
    Recipe
    Recycle
    Rice Cooker Recipes
    Slow Cooker Fridays
    Snacks
    Soup
    Sourdough Discard
    Spice Mixes
    Sugar Free
    Thanksgiving
    Tutorials
    Using Food Storage
    Valentines
    Vegan
    Videos
    Wheat
    Wood Projects


    Support this Site
    Shop with any of the companies below to support this site! Simply click on their image to start shopping—it won't cost you a thing.
Picture
This is a great resource page for gardeners that are just beginning and those that have been doing it a long time.
Picture
On the go a lot? Don't have time to always make a wholesome dinner for your family? Check out these recipes to get you ahead of the game.
Picture
How to's, ideas, inspiration, books, and so much more for learning how to can and preserve your food.
Copyright 2009 - 2025 Rural Housewife™ | Powered by The New KJV

SUPPORT THIS SITE: Shop with any of the companies below to support this site! Simply click on their image to start shopping—it won't cost you a thing.
Picture
Picture
Picture
Picture
Picture
Picture
Picture
Picture
Picture
Picture