Rural Housewife
  • HOME
    • My Story
    • Contact Me
  • BLOG
  • WE LOVE
  • RECIPES
    • Baked Goods
    • Breakfast
    • Chocolate
    • Dinner
    • Gluten Free
    • Granola
    • Make Ahead Meals
    • Mexican Favorites
    • Sugar Free
  • RESOURCES
    • Canning
    • Dehydrating
    • Frugal Living
    • Gardening
    • Meal Planning
    • Old Fashion Living
    • Raising Chickens
    • Small Business Dir. >
      • Submit Your Business
    • PROJECTS >
      • Crafts & Gifts
      • Holidays >
        • Christmas
        • Halloween
        • Mother's Day
        • Valentine's Day
      • Photography
    • Winter Sowing

Blog

Lilac Benefits & Recipes

5/16/2024

0 Comments

 
Picture

Lilacs boast a plethora of health benefits:

Picture
  1. ​Immune Support: Lilac's antioxidants bolster the immune system by safeguarding immune cells, potentially enhancing their function, and aiding in the body's defense against infections and illnesses.
  2. Antioxidant Protection: Abundant in flavonoids and polyphenols, lilacs combat harmful free radicals, mitigating oxidative stress and potentially reducing the risk of chronic ailments such as heart disease, cancer, and diabetes.
  3. Stress Relief: Renowned for its calming fragrance, lilacs offer stress relief and mood improvement. Lilac essential oil or absolute is utilized in aromatherapy to induce relaxation, diminish anxiety, and uplift mood.
  4. Skin Health: Packed with vitamin C and antioxidants, lilacs protect the skin from various environmental stressors, stimulate collagen production, and aid in skin repair, contributing to overall skin health.
  5. Anti-inflammatory Effects: Certain lilac compounds exhibit anti-inflammatory properties, which may alleviate conditions like arthritis, asthma, and inflammatory bowel disease by reducing inflammation in the body.
  6. Respiratory Benefits: In traditional medicine, lilacs have been utilized to address respiratory issues like coughs and congestion. Lilacs' anti-inflammatory and antimicrobial properties may soothe respiratory symptoms and promote lung health.


Picture
This batch took 2-3 days to air dry.
AIR DRIED LILAC PETALS
This is, probably, the easiest experiment that I did with the lilacs. The most tedious part was pulling off all the little petals.
  • Spread them out, in a single layer, onto a parchment lined tray or cookie sheet.
  • Set in an area that won't get a lot of sun, but is warm enough to air dry without molding.
  • Setting in the sun or heat drying them in a dehydrator/oven would be too hot and could alter the color and then aroma.

Picture
LILAC OIL INFUSION
INGREDIENTS
  • Fresh lilac flowers and leaves
  • Carrier oil (such as coconut oil or olive oil)
INSTRUCTIONS:
  1. Place petals of the lilacs in a glass jar.
  2. Pour the carrier oil over the lilacs until they are fully submerged.
  3. Seal the jar and store it in a cool, dark place for 2-4 weeks to allow the infusion to develop.
  4. After the infusion period, strain out the flowers and leaves from the oil.


LILAC TONER
​
Lilac blossoms and leaves possess astringent qualities, which can help to firm and mildly dry the skin, making them beneficial for individuals with oily or acne-prone skin. Try preparing the Lilac Toner provided below, or simply apply Lilac Infusion to your face after cleansing.
​Lilac also serves as an excellent tonic for both hair and scalp. Gently massage Lilac Infusion onto your scalp to fortify your hair from the roots and alleviate dandruff concerns.
Picture
All you need to make this is 2 simple ingredients, a quart size mason jar, and a few weeks for it infuse.
  1. Fill a jar with lilac blossoms, picked on a dry sunny day. Cover the flowers with 100% witch hazel. Place in a cool dark place that is easily accessible since you will need to shake it daily.
  2. After a few weeks (or longer if you want), strain into a clean jar and label. If kept in a cool dark place, this will last six months or longer.
TO USE: On clean dry skin, apply your toner with a cotton pad. No need to rinse. Follow with your usual skin care routine.

LILAC INFUSED HONEY
Creating lilac-infused honey is a delightful way to capture the essence of this fragrant flower. Here's how to make it:
  • Fresh lilac blossoms (ensure they are pesticide-free)
  • Honey (preferably raw and unfiltered)
INSTRUCTIONS:
  1. Begin by gently rinsing the lilac blossoms to remove any dirt or debris. Allow them to air dry completely.
  2. Once the blossoms are dry, pluck the individual flowers from the stems, discarding any green parts.
  3. Place the lilac blossoms into a clean, dry glass jar.
  4. Pour the honey over the lilac blossoms until they are completely submerged.
  5. Use a clean utensil, such as a chopstick or skewer, to gently stir the honey and lilac blossoms together, ensuring that the blossoms are evenly distributed throughout the honey.
  6. Seal the jar tightly with a lid and store it in a cool, dark place for about 1-2 weeks to allow the flavors of the lilac to infuse into the honey. The petals will rise to the top, so twice a day I would turn the jar over to get some movement in the mixture. You can also stir with a skewer or chopstick, but I didn't want to chance getting any contaminants in the jar. You can taste-test the honey after a week to see if the desired level of flavor has been achieved.
  7. Once the infusion period is complete, strain the honey through a fine-mesh sieve or cheesecloth to remove the lilac blossoms. Press down on the blossoms gently to extract as much infused honey as possible.
  8. Transfer the strained lilac-infused honey into a clean, dry jar or container for storage.
  9. Label the jar with the date of preparation and enjoy your homemade lilac-infused honey drizzled over toast, stirred into tea, or used in various culinary creations.
This lilac-infused honey adds a delicate floral flavor to any dish and makes a lovely homemade gift for friends and family. Enjoy experimenting with this unique and flavorful creation!
Picture
This picture was taken the day I combined them together.
Picture
This is 4 days later. - Still has quite a ways to go.
0 Comments

Drawing Salve w/ Activated Charcoal

12/18/2023

0 Comments

 
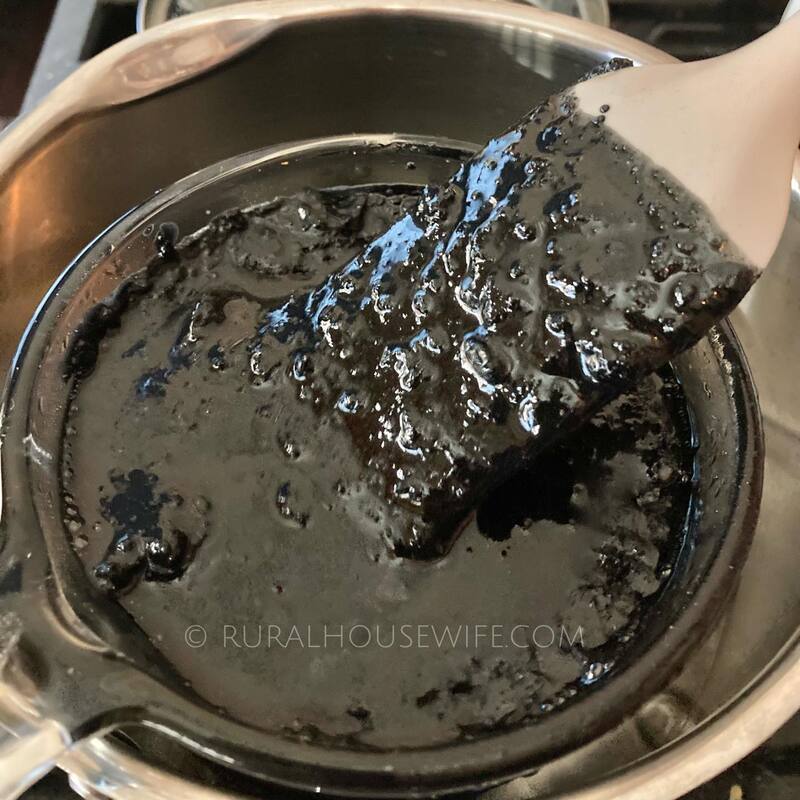
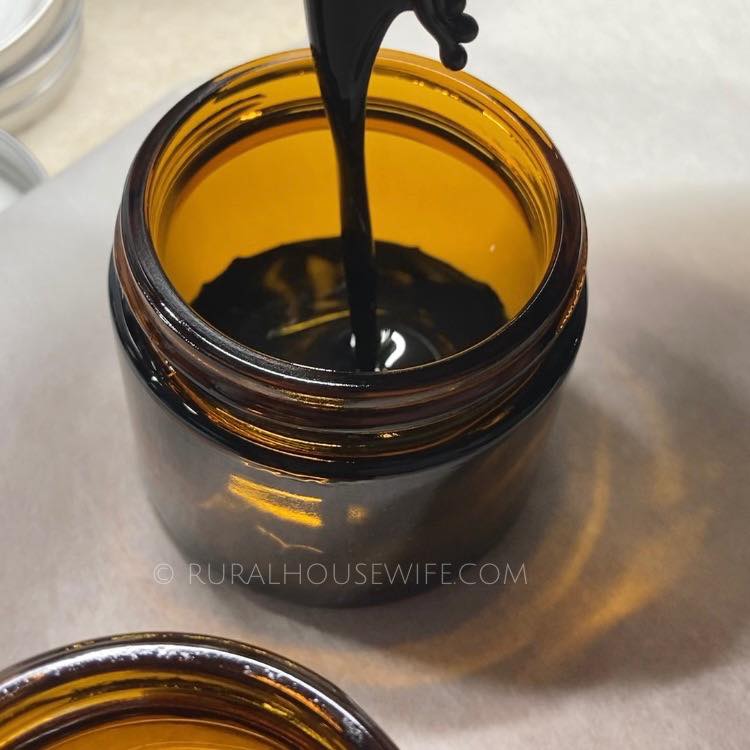
This activated charcoal drawing salve is known to help draw out splinters, boils, and insect bites.
Place small amount on the offending spot, then cover with a bandage for at least 12 hours. Repeat as needed. Please test on a small area of your skin to make sure you are not allergic to any of the ingredients.
Picture
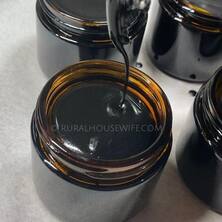
INGREDIENTS
1 cup castor oil (or any organic oil) - I used 1/2 castor oil and 1/2 my infused lemon balm oil.
1/4 cup beeswax
2 tbsp activated charcoal
2 tbsp bentonite clay powder
essential oils of your choice

DIRECTIONS
  1. In a small double boiler, first melt the beeswax, then once that has completely melted add the castor oil, activated charcoal, and bentonite clay. DO NOT use any metal spoons or mixing bowls that will come in contact with the mixture.
  2. Once mixture is all melted and combined, remove from heat and add your essential oils and stir to combine. For the one I just made - I used the following Organic Essential Oils: 10 drops Sage, 10 drops Clove, and 5 drops Tangerine. If you don't have animals in the house I would recommend using Tea Tree and Frankincense.
  3. Pour in amber (or dark colored) jars. I used 2 oz amber colored jars and it filled 4 of them.

Picture
It will look a little chunky at first, but the more it melts, the smoother it gets.
Picture
When pouring into jars, the mixture might start to set up, don't worry, just put the container you are using back in the boiling water until it melts all the way again. Do not have the heat on.
0 Comments

Uses for Salt

7/26/2022

0 Comments

 
Recently we bought a large bags of iodized salt, Epsom salt, and kosher salt to keep in our pantry. So for my reference, and now yours, here are some great uses for salt. Oh, and make sure to use the correct type of salt for each use. The majority of the uses are using regular salt (which is iodized salt), some point out that Epsom salt are used instead. This is very important especially in the garden & yard area.
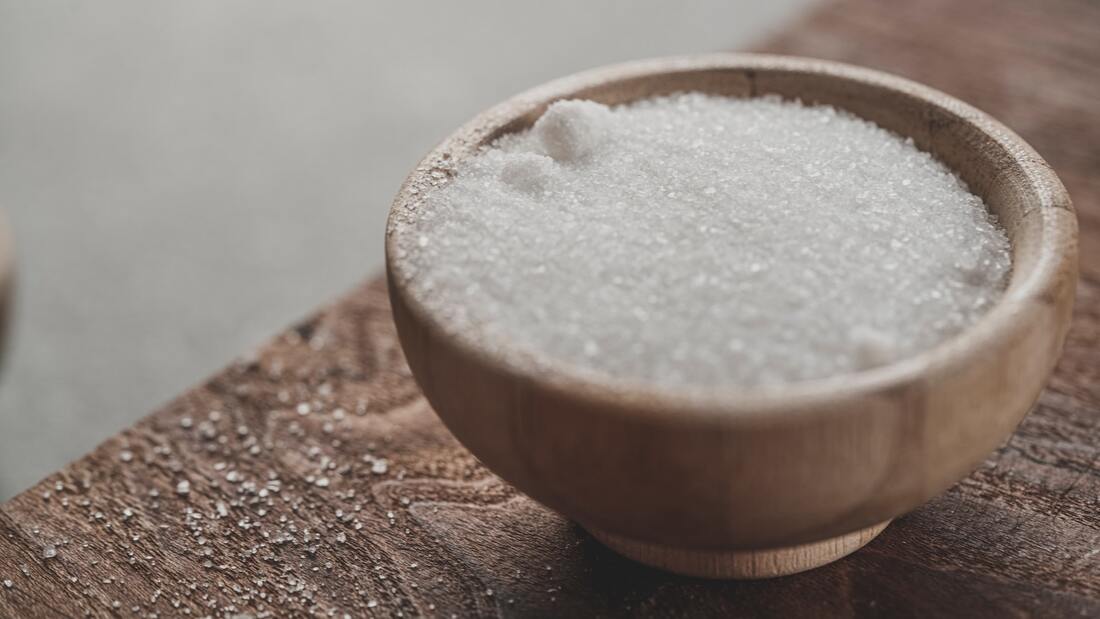
Picture
KITCHEN
  1. Put out a grease fire - A bucket of water is not necessarily the first thing you should grab in a fire; if you are dealing with a grease fire, water can actually cause the flames to spread. Instead, douse them in salt or baking soda, or quickly cover with a metal lid instead, per Food Network. 
  2. Test for rotten eggs - Not sure about that weeks-old egg carton sitting in the back of the fridge? Place an egg in a bowl of saltwater. If it sinks, your batch is fresh. An egg that is rotten, on the other hand, will float.
  3. Clean up a dropped egg - You may not cry over spilled milk, but a sticky, broken egg on the floor might be worthy of a few tears. Shake some salt over the mess and leave it alone for 20 minutes. When you come back to it, you’ll be able to clean the egg right up—no scrubbing required.
  4. Lift food scraps from pots and pans - If your pots and pans are dotted with stubborn food stains, leave them to soak in salt water overnight. The salt will soften and lift almost any kind of residue, making those dishes much easier to clean in the morning.
  5. Clean up grease stains - To say goodbye to grungy grease stains on your carpets and couches mix one part salt to four parts rubbing alcohol and vigorously rub it into the area. In the case of carpets, rub in the direction of its natural nap. The stain should fade away easily.
  6. Remove rust - Rusty knives make kitchen prep scary. Fear not: you can clean rust stains from knives with just 6 tablespoons of salt and 2 tablespoons lemon juice. Combine the two ingredients to create a paste and carefully rub it onto the rusted area using a soft, dry cloth. Rinse well then dry, and your knives will look good as new.

GARDEN & YARD
  1. Give your lawn a boost - Perhaps the grass on your lawn has seen better (read: greener) days. For an inexpensive fertilizer, mix two tablespoons of Epsom salt and a gallon of water in a spray bottle, and apply it to the grass. Epsom salt contains magnesium, which boosts a plant’s production of chlorophyll—the pigment responsible for their green hue.
  2. Protect your garden from pests - While chemical-filled pesticides can protect your garden from snails and slugs, they also pose a danger to animals and young children. For an all-natural repellent, roll the seeds in table salt before covering them with dirt. The pests will steer clear long enough to give your seedlings a fighting chance.
  3. Ward off fleas - Like snails and slugs, fleas are not fans of salt. If your pup is scratching up a storm, bathe them in a salty solution instead of water and soap. And it can’t hurt to wash the doghouse or pet bedding with saltwater, too. Salt will dehydrate the pests, protecting your four-legged friend from itchy bites.
  4. Kill weeds in cement cracks - Cracks in cement allow just enough space for pesky, unattractive grass or weeds to grow—and they are tough to treat with an average weed-whacker. Try sprinkling salt and pouring hot water over the area, instead. The weeds will shrivel, leaving behind a spotless sidewalk or driveway. 

HEALTH & BEAUTY
  1. Relieve bee stings - If you get stung by a bee, salt is a natural salve. Immediately wet the sting and cover with salt to lessen the pain and reduce swelling.
  2. Disinfect piercings - To speed up the healing process and prevent infections, soak new body piercing jewelry in salt water. Just be sure to use the correct ratio: The Piercing Bible recommends ¼ teaspoon of non-iodized salt for each cup of warm water. You can get too much of a good thing; water with high salt content can irritate your skin, according to the site.
  3. Use as a natural mouthwash - Store-bought mouthwash can contain toxic chemicals and other artificial ingredients. The all-natural alternative? Salt. Stir 1 teaspoon of cooking salt with 1 teaspoon of baking soda into half a cup of water, then gargle the mixture. The salt behaves like a disinfectant, killing off bacteria that causes bad breath.
  4. Treat puffy eyes - Eating too much salt can make you puffy, so it may seem counterintuitive that applying salt can be a remedy to swollen eyelids. Pour ½ teaspoon of salt into a cup of hot water and stir well, then soak a few cotton balls in the mixture and press them gently against your eyes. Voila!—puffiness problem solved.
  5. Relieve a sore throat - The next time you wake up that telltale tickle, mix some table salt in a glass of warm water and gargle for 30 seconds to ease the pain. It’s not just an old wives’ tale—salt can actually flush out mucus and other irritants that cause a sore throat.
  6. Soothe poison ivy rashes - When poison ivy erupts, salt to the rescue! Relieve the itch caused by poison ivy by soaking in a hot salt water bath.
  7. Make a DIY face scrub - This homemade face mask requires just two pantry staples: salt and olive oil. Make a paste using 1/4 cup of salt and ½ cup of olive oil, and gently apply it to your skin in a circular motion. Leave the mask in place for five minutes before washing it off. The moisturizing olive oil and exfoliating salt will leave your face, hands, and even lips feeling soft and refreshed.
  8. Soothe sunburns - Relieve a painful sunburn by spraying an Epsom salt and water mixture to the burnt area. The salt won’t heal the burn, but it will ease irritation and redness.
  9. Strengthen your nails - No time to hit the nail salon? No problem. At home, mix one teaspoon each of salt, baking soda, and lemon juice in 1/2 cup of hot water, and soak your fingertips in the mixture for 10 minutes. Then, scrub your nails to rinse them off. The treatment will soften your cuticles and strengthen your nails. Bonus: Dig your nails into the rind of the lemon, and your nails will look brighter and healthier too.
  10. Whiten your teeth - There are foods that whiten your teeth, and those that stain them. But brushing your teeth with salt once a week can brighten up your smile. Yes, really! Salt is a gentle and all-natural abrasive, helping to remove stains on your teeth.
  11. Extend the life of your toothbrush - The bristles on your toothbrush can last a lot longer with one simple trick. Place a new brush inside a small bowl or cup of hot water and salt—making sure the bristles are fully submerged—and allow it to soak for 10 to 15 minutes. Rinse well with clean water, and your toothbrush is good for another few months. Experts advise replacing your toothbrush every six months.
  12. Scrub away dandruff - When salt can be an effective treatment for dandruff, why bust your budget on expensive shampoo? Simply sprinkle some salt into your scalp, massage your head for five minutes, rinse, then shampoo as usual. The salt will exfoliate the dry skin on your scalp, and your hair will be squeaky clean after you shampoo.
  13. Relieve bug bites - For relief from the itching of mosquito and chigger bites, soak the area in salt water, then apply a coating of lard or vegetable oil.

FOOD & DRINK
  1. Make coffee taste less bitter - Move over, sugary lattes. If you drink your coffee unsweetened but prefer a less bitter brew, try tossing a pinch of salt into your mug. The seasoning contains sodium ions that neutralize or cancel out coffee’s bitter taste, research has found.
  2. Keep cheese from molding - Salt’s dehydrating powers can actually help slow the growth of mold on cheese. To reduce food waste (and save money on groceries), dip a paper towel in a mixture of 2 Tbsp. salt and 3 cups of water, and then wrap it loosely around your cheese before refrigerating.
  3. Chill beverages fast - Warm soda, beer, and wine can spell disaster for any party host. But if you have salt on hand, chilling those beverages won’t take long. Place the bottles and cans in a bucket of ice water and mix in a handful of salt. Once the salt works its magic, the beverages will be cold in no time.
  4. Test for rotten eggs - Not sure about that weeks-old egg carton sitting in the back of the fridge? Place an egg in a bowl of saltwater. If it sinks, your batch is fresh. An egg that is rotten, on the other hand, will float.
  5. Prevent sliced fruit from turning brown - Keep slices of fresh fruit looking, well, fresh by dipping them in a salt solution—1/8 teaspoon of salt and one cup of water—for a few minutes. Don’t forget to give them a quick rinse in fresh water, or you will be chomping down on salty fruit. The same trick works for potatoes and pears too, according to TODAY.

CLEANING
  1. Remove wine stains from carpet - When it comes to red wine spills, it pays to act fast. First, while the stain is still wet, pour some white wine on it to dilute the color of the stain. Then dab the spot with a sponge and cold water. Next, sprinkle the area with salt, wait about 10 minutes, and vacuum up the whole mess. 
  2. Remove coffee and tea stains from mugs - A bit of salt can make mugs and china cups sparkle like new again; just give each piece a quick scrub with salt and then rinse them in hot water.
  3. Clean your fridge - You should clean your fridge every three to six months to keep it looking (and smelling) good, but elbow grease alone doesn’t always do the trick. To lift stubborn food stains and smells, scrub the shelves with 1/2 cup of salt mixed with two liters of warm water.
  4. Freshen up a dirty broom - An old-fashioned broom can still be a homeowner’s best friend—But a broom’s bristles can be magnets for dirt and dust. Soaking them in a bucket of hot salty water for 30 minutes will loosen up the grime. Then just wipe them off with an old cloth and leave to dry. 
  5. Sanitize wood cutting boards - Wood boards can be sanitized using salt, rubbed in with a lemon wedge, then rinsed clean. 
  6. Revive faded linens - Did your favorite shirt fade in the wash? Try this: Dip a washcloth in a strong saltwater solution, wring it out, and rub the garment. Doing so should brighten its colors. This works for faded rugs and curtains, too. If your clothes are consistently fading, it could be a sign you’re using too much laundry detergent.
  7. Stop soap spillage - No need to panic over an overflowing washing machine or dishwasher. Stop the suds from spreading by sprinkling salt over the mess until you can grab some extra towels.
  8. Remove watermarks from wood - Glasses or bottles can leave watermarks on wood that really stand out. Make them disappear by mixing 1 teaspoon salt with a few drops of water to form a paste. Gently rub the paste onto the ring with a soft cloth or sponge and work it over the spot until it’s gone. Then, restore the luster of your wood with furniture polish.
  9. Restore a sponge - Hand and mop sponges usually get grungy long before they are actually worn out. To revive your sponges to a pristine state, soak them overnight in a solution of about 1/4 cup salt per liter of water. Try these 95 household uses for vinegar you never knew about, too.
  10. Deodorize your sneakers - Sneakers and other canvas shoes can get pretty smelly, especially if you wear them without socks in the summertime. Knock out the odor and soak up the moisture by occasionally sprinkling a little salt in your canvas shoes.
  11. Brighten sweat-stained clothes - Believe it or not, that white undershirt with yellow persperation stains might not be a lost cause. Sweat-stained garments can be revived by soaking them in a pot of boiling water that’s been seasoned with a few tablespoons of salt and baking soda.
  12. Prevent dye from bleeding - A new item of clothing won’t run in the wash if you soak it in salt water first. Combine ½ gallon of water with 1/3 cup vinegar and ½ cup salt, and then leave your garment in the solution for one hour. Rinse it off until the water runs clear.
  13. Make a cloudy vase sparkle again - Uh, oh—your once-beautiful bouquet has wilted, leaving cloudy deposits of minerals on the vase interior. Reach inside the vase, rub the offending ring of deposits with salt, then wash with soapy water. If your hand won’t fit inside, fill the vase with a strong solution of salt and water, shake it or brush gently with a bottle brush. then wash. This should clear away the residue. 
  14. Erase blood stains - Blood stains are notoriously tough to remove from linens. Lifehacker recommends soaking the garment in salt water, followed by a wash in hot, soapy water, but we recommend a cold saltwater soak.
  15. Keep wicker looking new - Wicker furniture tends to yellow with age and exposure to the sun and elements. To keep your wicker natural-looking, scrub it with a stiff brush dipped in warm salt water. Let the piece dry in the sun. Repeat this process every year or every other year for best results.
  16. Remove grass stains - Some laundry products are a waste of money. Before you splurge on pricey stain-lifters, try treating stubborn grass stains with lemon and salt first. Squeeze lemon juice over the stain, sprinkling on a thick layer of salt, and then rub the stain with a lemon rind and watch it fade away.
  17. Ease fireplace cleanup - How do you safely put a fire out? Douse the flames with salt. The fire will burn out more quickly, so you’ll wind up with less soot than if you let it smolder. Cleanup the next day will be easier, too, because the salt helps the ashes and residue gather into easy sweepings.
  18. Clean up a dropped egg - You may not cry over spilled milk, but a sticky, broken egg on the floor might be worthy of a few tears. Shake some salt over the mess and leave it alone for 20 minutes. When you come back to it, you’ll be able to clean the egg right up—no scrubbing required.
  19. Wipe away oven spills - Chefs prize salt as an ingredient that can amp up the taste of almost any dish. Well, it can also be used to fix a home cook’s worst nightmare—oven spills. Covering a spill immediately with salt will not only stop smoke and odors from building, but the mess will also be easier to wipe up after the oven cools. For grime that has already been baked on, using a few dishwashing tabs will do the trick.
  20. Remove lipstick marks from glassware - Glassware with leftover lipstick stains can be a major turn-off for houseguests. To get rid of the marks fast, rub the rims with salt and toss the glasses into the dishwasher. They will shine like new in no time, guaranteed.
  21. Make your own brass and copper polish - When cleaning household items that are silver, take care; there are tricks to polishing silver. To shine your candlesticks or remove green tarnish from copper items, make a paste by mixing equal parts salt, flour, and vinegar. Use a soft cloth to rub this over the item, then rinse with warm, soapy water and buff back to its original shine.
  22. Clean gunk off your iron - Minerals from hard water can accumulate on your iron’s metal plate, and that can translate into stains on your freshly laundered and ironed clothes. To get your iron sparkling clean, turn it on its highest setting, then toss a pinch of table salt onto your ironing board and press the iron over it. This trick should remove any gunk.

MISCELLANEOUS
  1. Create non-drip candles - Nothing distracts from a gorgeous candle display like messy wax drips. To keep them from dripping, create a “shell” around the wax and trap the drips inside by using this saltwater trick. Place your candles in a large, flat dish and soak them in a saltwater solution (2 cups water and 2 Tbsp. salt) for 24 hours, then dry them well. Now when you light the candles, they won’t make such a mess.
  2. Hold artificial flowers in place - Salt is a great medium for keeping artificial flowers in the arrangement you want. Fill a vase or other container with salt, add a little cold water, and arrange your artificial flowers. The salt will solidify, helping the flowers stay put. Not a fan of fake flowers? 
  3. Keep clothes from freezing on the line - When it comes to laundry, some things should never go in the dryer. When line-drying the old-fashioned way, try tossing a bit of salt in your next load. The extra blast of sodium will keep your clothes from freezing on the clothesline in cold weather. You can also prevent clothes from sticking to the line by soaking the rope itself in salt.
  4. End the ant parade - Strange, but true: If ants are beating a path to your home, you can intercept them by sprinkling salt across the door frame or directly on their paths. Ants will be discouraged from crossing this barrier.
  5. Refresh artificial flowers - Artificial flowers—whether they are authentic silk ones or the more common nylon variety—can get dusty and fade over time. But you can refresh them by placing them in a paper bag with 1/4 cup salt. Give the bag a few gentle shakes, and your flowers will emerge as clean as the day you bought them.
  6. Unclog a drain - Fixing a clogged drain doesn’t necessarily require a plumber. Try this quick DIY fix: Combine 1 cup of salt with 1 cup of baking soda and 1/2 cup of white vinegar, and then pour it down the drain. Let it sit for 10 minutes before pouring about two liters of boiling water down the drain. Finally, turn on the hot water tap and let it flow; after a few seconds, water should be running freely down the drain.
  7. Keep windows frost-free - You probably know that salt will decrease the temperature at which ice freezes. This doesn’t just come in handy for icy roads and sidewalks, though; it can also keep your home’s windows free of frost. Simply wipe them with a sponge dipped in salt water, and then let them dry.
  8. Clear away chimney soot - When soot builds up in your chimney, shake a generous amount of salt onto the coals after your next fire to boost air circulation, prevent chimney fires, and give flames a yellow glow.
  9. De-fog your windshield - Rub a bag of salt on the windshield and windows of your car each winter. The salt will decrease the temperature at which water freezes, keeping the car windows clear of ice or snow.
0 Comments

DIY Snot Stick (aka Sinus Rub)

3/12/2015

1 Comment

 
Picture
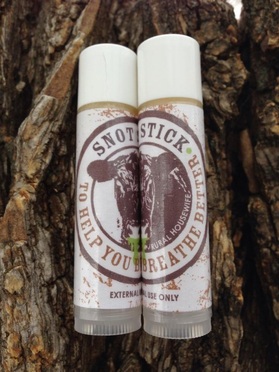
My newest creation... The Snot Stick - LOL. It is like Chapstick for your nose. It has been essential to me in dealing with this sinus infection. I have Eucalyptus, Tea Tree, and Peppermint Essential Oils to aid in reducing the inflammation and to help open up my sinuses so they will drain better. I put it under my nose and on the sides of my nose.

P.S. I purchase my Essential Oils from Vitamin Cottage / Natural Grocers and they are all 100% Pure Organic. I also purchase my containers from them as well. As far as the Bee's Wax, I use from a local organic source.

INGREDIENTS

1/2 ounce brick organic bee's wax (grated or chopped up for faster melting)
5 vitamin E capsules
2 tbsp coconut oil
1.5 tsp cocoa butter
25 drops peppermint
15 drops eucalyptus
10 drops tea tree oil

DIRECTIONS
In a double boiler place bee's wax and coconut oil and melt on medium/low heat. Stir until the beeswax is completely melted. Remove from heat and add the cocoa butter and the liquid from the vitamin E capsules (do not place the casing in the mixture - throw casing away). Once the cocoa butter is melted, add your essential oils, and stir to combine. Fill your container with the liquid and allow to set for 2-3 hours or until firm.

Eucalyptus Oil
"How does it work? Eucalyptus leaf contains chemicals that might help control blood sugar. It also contains chemicals that might have activity against bacteria and fungi. Eucalyptus oil contains chemicals that might help pain and inflammation. It might also block chemicals that cause asthma." For more information on Eucalyptus Oil visit WebMD where you will find Special Precautions & Warnings for Pregnancy and breast-feeding, Children, People with Diabetes, and Scheduled Surgery.

Peppermint Oil
"How does it work? Peppermint oil seems to reduce spasms in the digestive tract. When applied to the skin, it can cause surface warmth, which relieves pain beneath the skin." For more information on Eucalyptus Oil visit WebMD where you will find Special Precautions & Warnings.

Tea Tree Oil
"
How does it work? The chemicals in tea tree oil may kill bacteria and fungus, and reduce allergic skin reactions." For more information on Eucalyptus Oil visit WebMD where you will find Special Precautions & Warnings.

1 Comment
<<Previous
    Picture
    Picture
    Explore the New Mountain Rose Journal & Catalog

    Picture

    Categories

    All
    365 Days Of Thanks
    Adventures
    Appetizers / Side Dishes
    Baked Goods
    Being A Wife
    Bible Study
    Bread
    Breakfast
    Budget Fun
    Canning
    Chocolate
    Chocolate Mondays
    Christmas
    Cookies
    Craft Nights
    Crafts
    Dairy Free
    Dehydrator
    Dinner
    D I Y
    E-BOOKS
    Experiments
    Farm Girl
    Freeze Dried
    Furniture
    Gift Ideas
    Gluten Free
    Green Tomatoes
    Halloween
    Handmade
    Herbal Remedies
    Homemade
    Ice Cream
    InstantPot Recipes
    Leather
    Low Sodium
    Make Ahead Meals
    Meals In A Jar
    Mexican Favorites
    Mothers Day
    Mug Recipes
    My Attempt At Gardening
    My Attempt At Sewing
    My Faith
    My Life
    Natural Beauty
    Our Town
    Painting
    Photography
    PRINTABLES
    Pumpkin
    Quick Fixin's
    Recipe
    Recycle
    Rice Cooker Recipes
    Slow Cooker Fridays
    Snacks
    Soup
    Sourdough Discard
    Spice Mixes
    Sugar Free
    Thanksgiving
    Tutorials
    Using Food Storage
    Valentines
    Vegan
    Videos
    Wheat
    Wood Projects


    Support this Site
    Shop with any of the companies below to support this site! Simply click on their image to start shopping—it won't cost you a thing.
Picture
This is a great resource page for gardeners that are just beginning and those that have been doing it a long time.
Picture
On the go a lot? Don't have time to always make a wholesome dinner for your family? Check out these recipes to get you ahead of the game.
Picture
How to's, ideas, inspiration, books, and so much more for learning how to can and preserve your food.
Copyright 2009 - 2025 Rural Housewife™ | Powered by The New KJV

SUPPORT THIS SITE: Shop with any of the companies below to support this site! Simply click on their image to start shopping—it won't cost you a thing.
Picture
Picture
Picture
Picture
Picture
Picture
Picture
Picture
Picture
Picture