Rural Housewife
  • HOME
    • My Story
    • Contact Me
  • BLOG
  • WE LOVE
  • RECIPES
    • Baked Goods
    • Breakfast
    • Chocolate
    • Dinner
    • Gluten Free
    • Granola
    • Make Ahead Meals
    • Mexican Favorites
    • Sugar Free
  • RESOURCES
    • Canning
    • Dehydrating
    • Frugal Living
    • Gardening
    • Meal Planning
    • Old Fashion Living
    • Raising Chickens
    • Small Business Dir. >
      • Submit Your Business
    • PROJECTS >
      • Crafts & Gifts
      • Holidays >
        • Christmas
        • Halloween
        • Mother's Day
        • Valentine's Day
      • Photography
    • Winter Sowing

Blog

Spiced Pear & Walnut Muffins

9/7/2022

5 Comments

 
Picture
INGREDIENTS:
2 pears - cored & diced
3 pears cored & blended
1/2 cup sugar
1/4 cup brown sugar (or you can substitute stevia or splenda for the sugars)
1/3 cup olive oil
2 eggs
2 tsp vanilla
2 cups flour
1/2 cup whole wheat flour
2 tsp baking powder
2 tsp cinnamon
1/4 tsp nutmeg
1/4 tsp ground ginger
1/4 tsp salt
2/3 cup toasted walnuts
 
Topping:
1/2 cup brown sugar (or you can substitute stevia or splenda for the sugar)
1 cup rolled oats (not quick oats)
3 tbsps butter, melted (or olive oil)
1 tsp cinnamon
 
DIRECTIONS:
  1. Preheat the oven to 350 F. Lightly grease or line muffin tins with paper liners.
  2. Combine the diced pears and sugars (or sugar free substitute). Toss until the pears are well coated.
  3. Combine flour, baking powder, salt, cinnamon, nutmeg, and ginger. Set aside.
  4. Blend together blended pears, eggs, oil, and vanilla until smooth. Add the blended mixture to the dry ingredients; mix well. Fold in pears and walnuts just until combined. Spoon into prepared muffin cups, dividing batter equally.
  5. For the topping, combine sugar (or sugar free substitute), rolled oats, butter (or olive oil), and cinnamon. Sprinkle evenly over the muffins.
  6. Bake for 25-30 minutes or until golden.
Picture
These nutritional facts are with using low sodium baking powder and stevia as the sweetner.
5 Comments

Very Simple Pumpkin Cream Cheese Danish

10/20/2020

0 Comments

 
Picture
INGREDIENTS
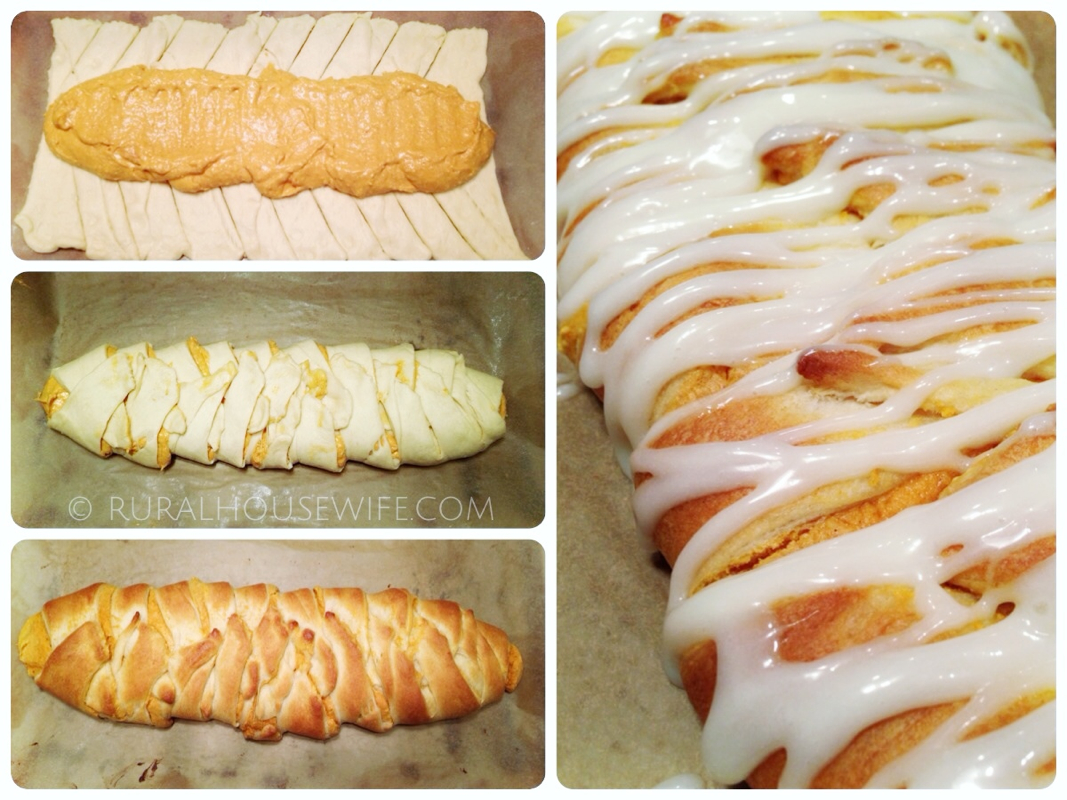
1 tube crescent rolls
6 oz. softened cream cheese
1/2 cup 100% pure pumpkin (not pie filling)
1/2 cup granulated sugar
1/2 teaspoon cinnamon
1/4 teaspoon nutmeg
pinch of ground cloves
1 teaspoon vanilla
2 tablespoons unbleached flour

FOR THE GLAZE

2 oz. cream cheese
1/2 cup powdered sugar
2 tablespoon milk

DIRECTIONS
  1. Preheat oven to 375 degrees.
  2. In a medium bowl, mix together cream cheese, pumpkin, sugar, spices, flour and vanilla. Set aside.
  3. Pop open crescent roll dough and unroll on an ungreased baking sheet, lined with parchment paper, leaving crescents in rectangles. Press edges together to even out edges and seal any holes.
  4. Cut 3/4 inch diagonal strips up each side of the dough.
  5. Carefully spread cream cheese filling down the center of the dough to be about 2-3 inches wide. Fold the dough pieces up over filling alternating sides to get a braided pattern. You may have excess dough once you reach the end of the danish, so fold them in as best as you can.
  6. Bake for 15-20 minutes or until filling is set and crescent dough is golden in color. Cool before removing from baking sheet.
  7. Once danish has cooled, remove to serving platter.
  8. In a small bowl, mix together powdered sugar, cream cheese, and milk to create icing. You may need to add more cream to get the desired consistency.
  9. Drizzle icing over danish. Cut into pieces and serve.
0 Comments

Gluten Free Hamburger Buns

2/14/2019

0 Comments

 
Picture
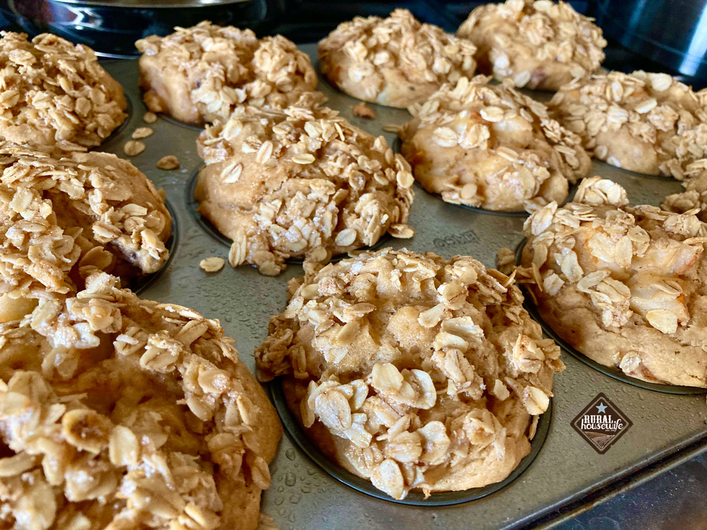
This was my first time using coconut flour. It makes a nice hearty bun that can hold up to what ever you use to fill it. Tonight I filled mine with a Cooked Chicken Breast and Sharp Cheddar Cheese and it was delightful! The bun held up nicely and only started to crumble a little towards the last couple of bites.

INGREDIENTS

1 1/4 cup coconut flour
1 tbsp. baking powder
1 tsp. Kosher salt
6 eggs
1/2 cup olive oil
1 Tbsp. water

DIRECTIONS
  1. Preheat the oven to 325 degrees. Add coconut flour, baking powder, and kosher salt to a medium mixing bowl. Mix until combined.
  2. Add the eggs, olive oil, and water to the dry ingredients.
  3. Mix well and let sit for about 10 minutes, allowing the dry ingredients to soak up the wet ingredients.
  4. Divide dough into 5-6 equal parts (5 for larger buns and 6 for smaller buns). Dough is very wet, but not sticky.
  5. Quickly form bun shapes from the dough and place on a baking sheet lined with parchment paper. This is where you can add your toppings (optional). For these I used Trader Joe’s “Everything but the Bagel” seasoning.
  6. Bake in the oven for 30 minutes at 325 degrees.
  7. Using a knife, slice the buns in half horizontally.

Yields: 5-6 buns
Picture
0 Comments

Banana Bread

12/31/2018

1 Comment

 
Picture
Picture
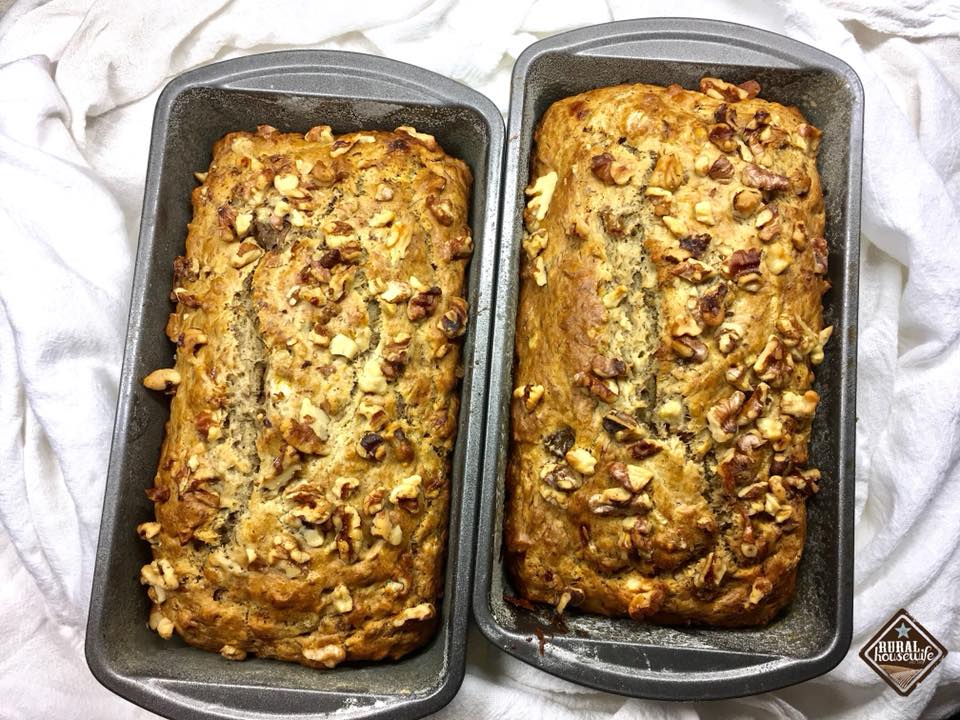
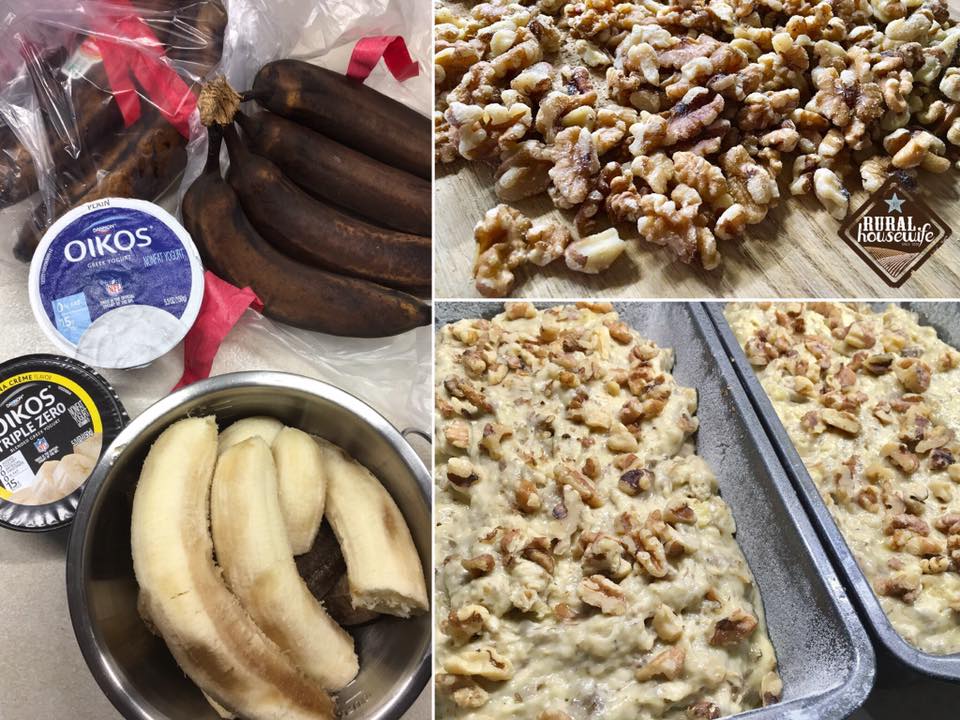
Banana Bread w/ Toasted Walnuts
Makes one 9-inch loaf

Ingredients
2 cups unbleached all-purpose flour, plus more for dusting the pan
1 1/4 cups walnuts, chopped coarse
3/4 cup Sugar (if you want to make it Sugar Free add 1 cup sugar substitute instead of Sugar)
3/4 teaspoon baking soda
1/2 teaspoon salt
3 very ripe, soft, darkly speckled large bananas, mashed well (about 1 1/2 cups)
1/4 cup plain Greek yogurt
2 large eggs, beaten lightly
3/4 stick unsalted butter, melted and cooled (or olive oil)
1 teaspoon vanilla extract

Directions
  1. Adjust an oven rack to the lower-middle position and heat the oven to 350°F (175°C) degrees. Grease the bottom and sides of a 9 by 5-inch loaf pan; dust with flour, tapping out the excess.
  2. Spread the walnuts on a baking sheet and toast until fragrant, 5 to 10 minutes. Set aside to cool.
  3. Whisk the flour, sugar (or Splenda), baking soda, salt, and walnuts together in a large bowl; set aside.
  4. Mix the mashed bananas, yogurt, eggs, butter, and vanilla with a wooden spoon in a medium bowl. Lightly fold the banana mixture into the dry ingredients with a rubber spatula until just combined and the batter looks thick and chunky. Scrape the batter into the prepared loaf pan.
  5. Bake until the loaf is golden brown and a toothpick inserted in the center comes out clean, about 55 minutes. Cool in the pan for 5 minutes, then transfer to a wire rack. Serve warm or at room temperature.
1 Comment
<<Previous
    Picture
    Picture
    Explore the New Mountain Rose Journal & Catalog

    Picture

    Categories

    All
    365 Days Of Thanks
    Adventures
    Appetizers / Side Dishes
    Baked Goods
    Being A Wife
    Bible Study
    Bread
    Breakfast
    Budget Fun
    Canning
    Chocolate
    Chocolate Mondays
    Christmas
    Cookies
    Craft Nights
    Crafts
    Dairy Free
    Dehydrator
    Dinner
    D I Y
    E-BOOKS
    Experiments
    Farm Girl
    Freeze Dried
    Furniture
    Gift Ideas
    Gluten Free
    Green Tomatoes
    Halloween
    Handmade
    Herbal Remedies
    Homemade
    Ice Cream
    InstantPot Recipes
    Leather
    Low Sodium
    Make Ahead Meals
    Meals In A Jar
    Mexican Favorites
    Mothers Day
    Mug Recipes
    My Attempt At Gardening
    My Attempt At Sewing
    My Faith
    My Life
    Natural Beauty
    Our Town
    Painting
    Photography
    PRINTABLES
    Pumpkin
    Quick Fixin's
    Recipe
    Recycle
    Rice Cooker Recipes
    Slow Cooker Fridays
    Snacks
    Soup
    Sourdough Discard
    Spice Mixes
    Sugar Free
    Thanksgiving
    Tutorials
    Using Food Storage
    Valentines
    Vegan
    Videos
    Wheat
    Wood Projects


    Support this Site
    Shop with any of the companies below to support this site! Simply click on their image to start shopping—it won't cost you a thing.
Picture
This is a great resource page for gardeners that are just beginning and those that have been doing it a long time.
Picture
On the go a lot? Don't have time to always make a wholesome dinner for your family? Check out these recipes to get you ahead of the game.
Picture
How to's, ideas, inspiration, books, and so much more for learning how to can and preserve your food.
Copyright 2009 - 2025 Rural Housewife™ | Powered by The New KJV

SUPPORT THIS SITE: Shop with any of the companies below to support this site! Simply click on their image to start shopping—it won't cost you a thing.
Picture
Picture
Picture
Picture
Picture
Picture
Picture
Picture
Picture
Picture