 INGREDIENTS
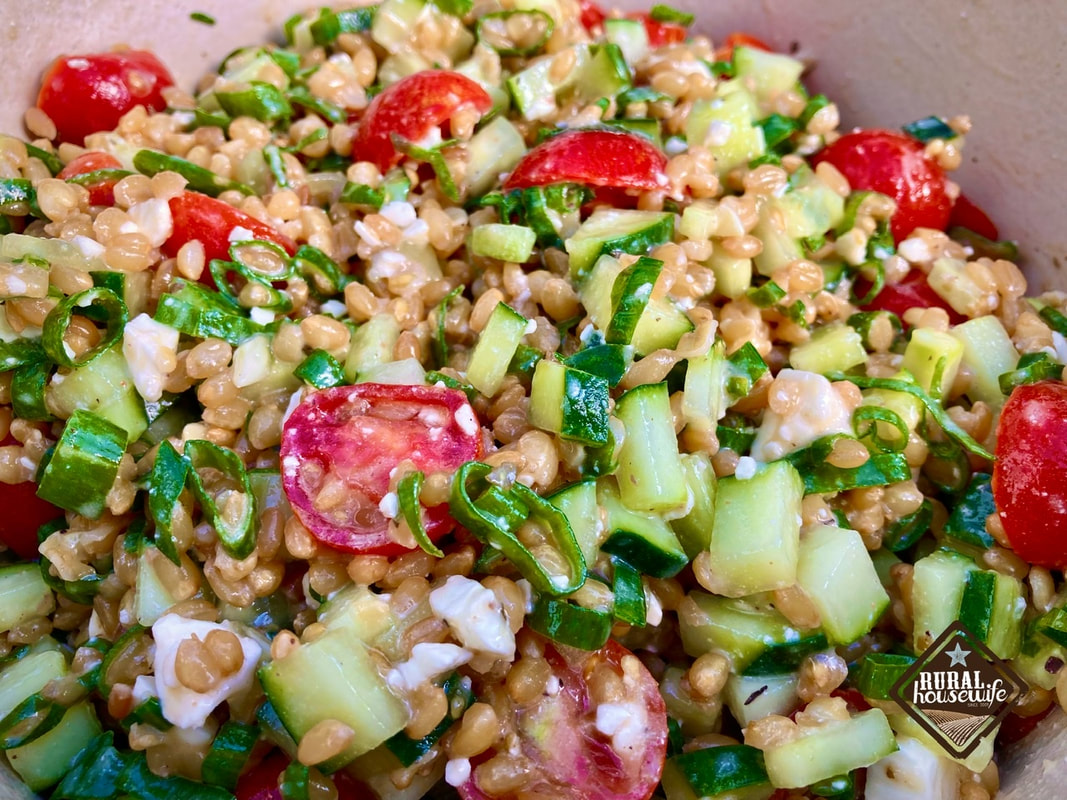
1 cup wheat berries (dry) 2 cups cherry tomatoes (cut in half) 2 cups diced cucumber 1 cup fresh chives 1 cup feta 1/4 Greek Dressing (I used Kraft) DIRECTIONS
0 Comments
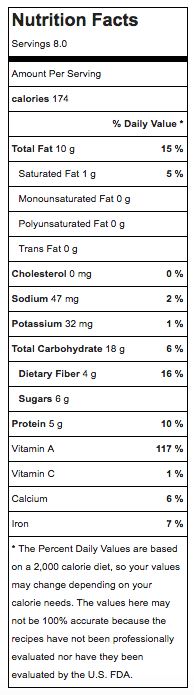
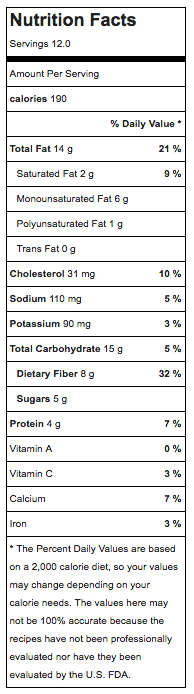
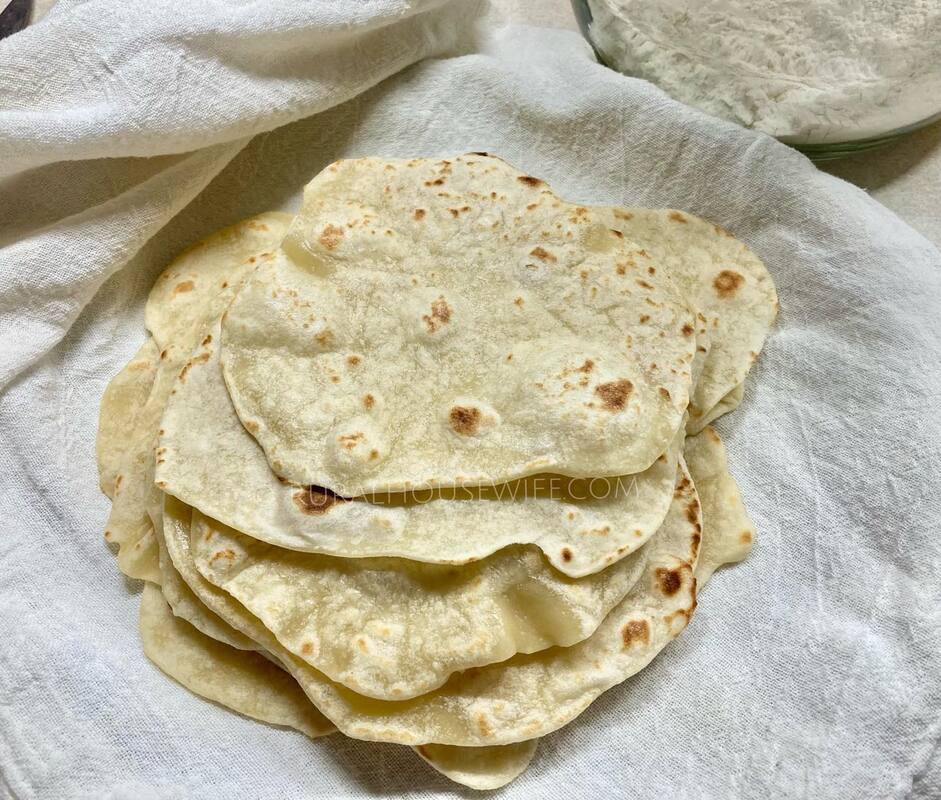
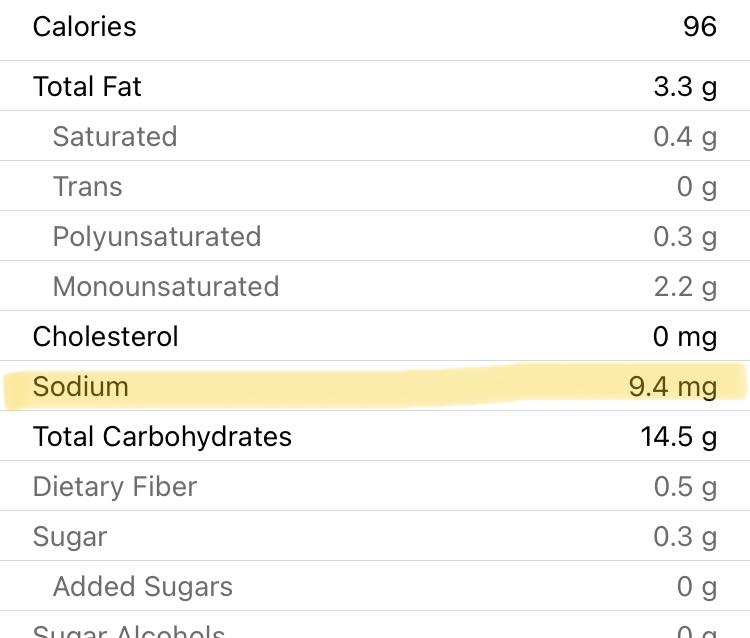
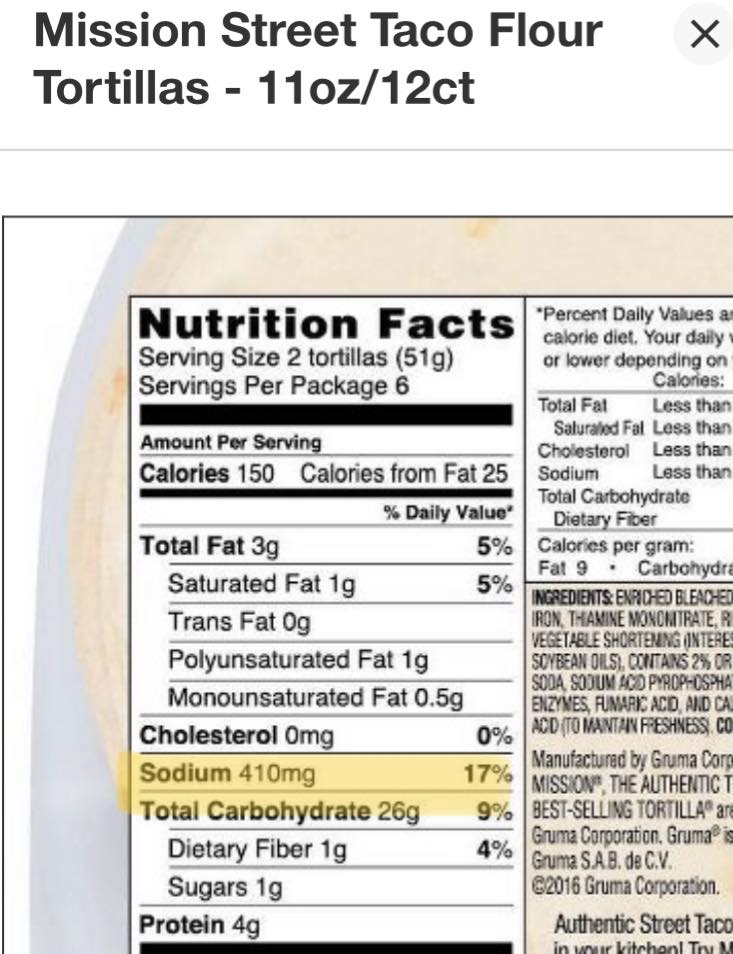
Made street taco size tortillas for dinner tonight. These little non-circular weirdos only have 9.4 mg of sodium compared to the 205 mg for store bought. This is why I love making homemade essentials.
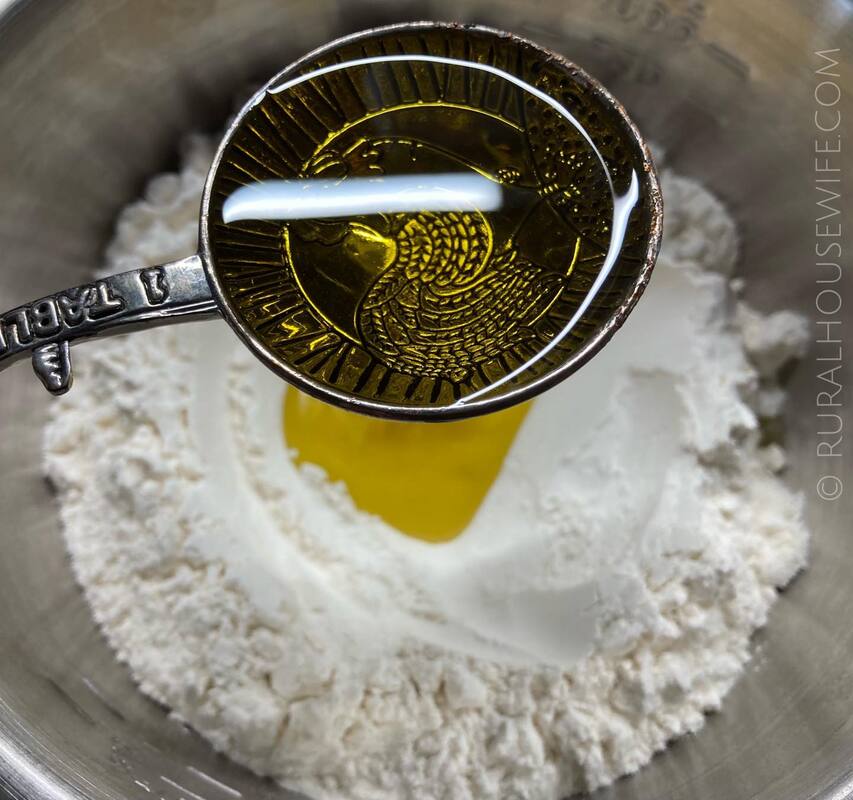
#taconight Ingredients: 2 cups flour 3 Tbsp olive oil 3/4 hot water 1/4 tsp kosher salt Makes 16 little weirdos Instructions: I just mixed it all in a bowl (or you can use a kitchenaid with a dough hook), kneaded about 1-2 minutes until it forms a dough, then divided them into 16 little dough balls. Rolled them out and then placed on a pan (medium heat) until they started to bubble a little and then flipped. Kept them warm in a towel until I had them all done. I think the only thing that took a while was the rolling out. But since they are small you could use a tortilla press if you have one. |

Categories
All

|